Set up Instructions for Azure Data Lake Storage Database
This subtopic covers instructions and essential notes on how to set up Azure Data Lake Storage as a destination on Daton.
Set up Instructions for Azure Data Lake Storage Database
This subtopic covers instructions and essential notes on how to set up Azure Data Lake Storage as a destination on Daton.
Setting up access to your Azure Data Lake Storage is not very complicated and just takes a couple of simple steps.
Follow the steps below to set it up for yourself, if you are stuck somewhere, feel free to contact out support team at support@sarasanalytics.com.
Prerequisites
To establish a connection between Azure Data Lake Storage and Daton, the following prerequisites are required:
- Azure ADLS Gen2 account with Administrator permissions and a Daton account.
- An ADLS Gen2 container
- Permission to create an Azure service principal
Set up on Azure Data Lake
Task 1: Create a Storage Account
To create a new Storage Account:
- Log in to the Azure portal.
- On the Navigation Pane, click Storage Accounts.

-
On the redirected page, click Create.

-
Provide a unique Storage account name in the Basics tab. (This name will be used during integration in Daton)

- Follow the Microsoft Azure documentation for detailed information on creating a storage account.
Task 2: Create an ADLS container
- Navigate to the storage account you generated in Task 1.
-
Access Containers in the navigation menu and click Create Container.

- Within the New Container pane, input a Name for your container. (This name will be used during integration in Daton)

- Choose an access level for the container from the access level drop-down menu and click Create.
Task 3: Register an Application and Add a Service Principal
- Navigate to Azure Active Directory in the navigation menu.
-
Access App registrations and click New registration.

- Provide a Name for the application.
-
In the Supported Account Types section, choose Accounts in this organizational directory only, and then click Register.

-
Your Application (client) ID and Directory (tenant) ID will be displayed. Take note of these as you will require them during the Daton configuration.

Task 4: Create a Client Secret
- Choose the application you registered in Task 3.
-
Navigate to Certificates & secrets in the navigation menu, and click New client secret.

-
Provide a Description for the Client Secret.

- Select an expiry period for the client secret from the Expires drop-down menu and click Add.
- Take note of the client secret, as you'll need it for configuring Daton.

Task 5: Assign a Role to the Container
- Select the Container created in Task 2 and select Access Control (IAM).
- Click Add, then select Add role assignments.
- On the Role tab, choose Storage Blob Data Contributor and proceed.
- Within the Member tab, opt for User, group, or service principal.
- Click Select members, pick the service principal added in Task 3, and then click Select.
- Click Review + Assign.
The steps laid out earlier in the document are a pre-requisite before you start configuring Azure Data Lake as a destination in Daton.
Set up on Daton
- Log in to your Daton account and navigate to the Destinations page.
- Click the Add New Destination button and select Azure Data Lake Storage from the list of options.
-
Enter the Integration Name and click Next. Provide a unique name for your Azure Data Lake integration. This name will be used to create tables in the data warehouse and cannot be modified later.

-
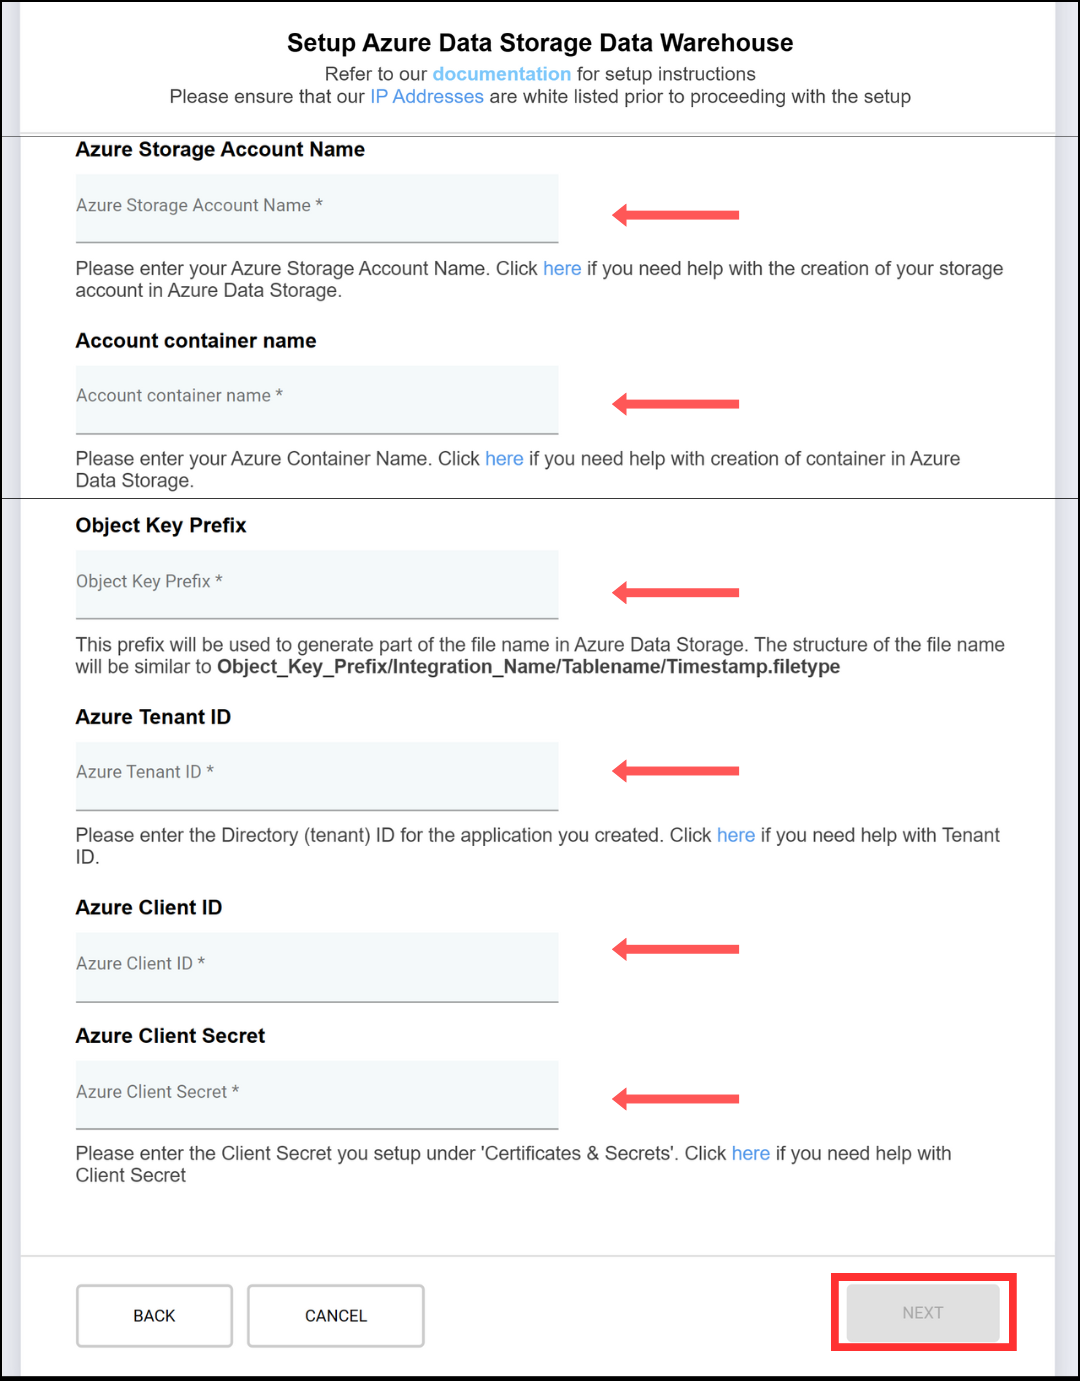
Enter the following details to configure the connection to your Azure Data Lake Storage database and click Next.
- Azure Storage Account Name: Your Storage Account Name as specified in Task 1.
- Account Container Name: Add the Name of your Container as added in Task 2.
- Object Key Prefix: Add a name of your choice. This will be used to generate the file name in Azure Data Lake Storage.
- Tenant ID: Add your Tenant ID as obtained in Task 3.
- Client ID: Add your Client ID as obtained in Task 3.
-
Client Secret: Add your Client Secret as created in Task 4.
- Select the Additional Key Elements option and click Submit.
-
If Yes, Select Optional Key Elements from the dropdown menu.
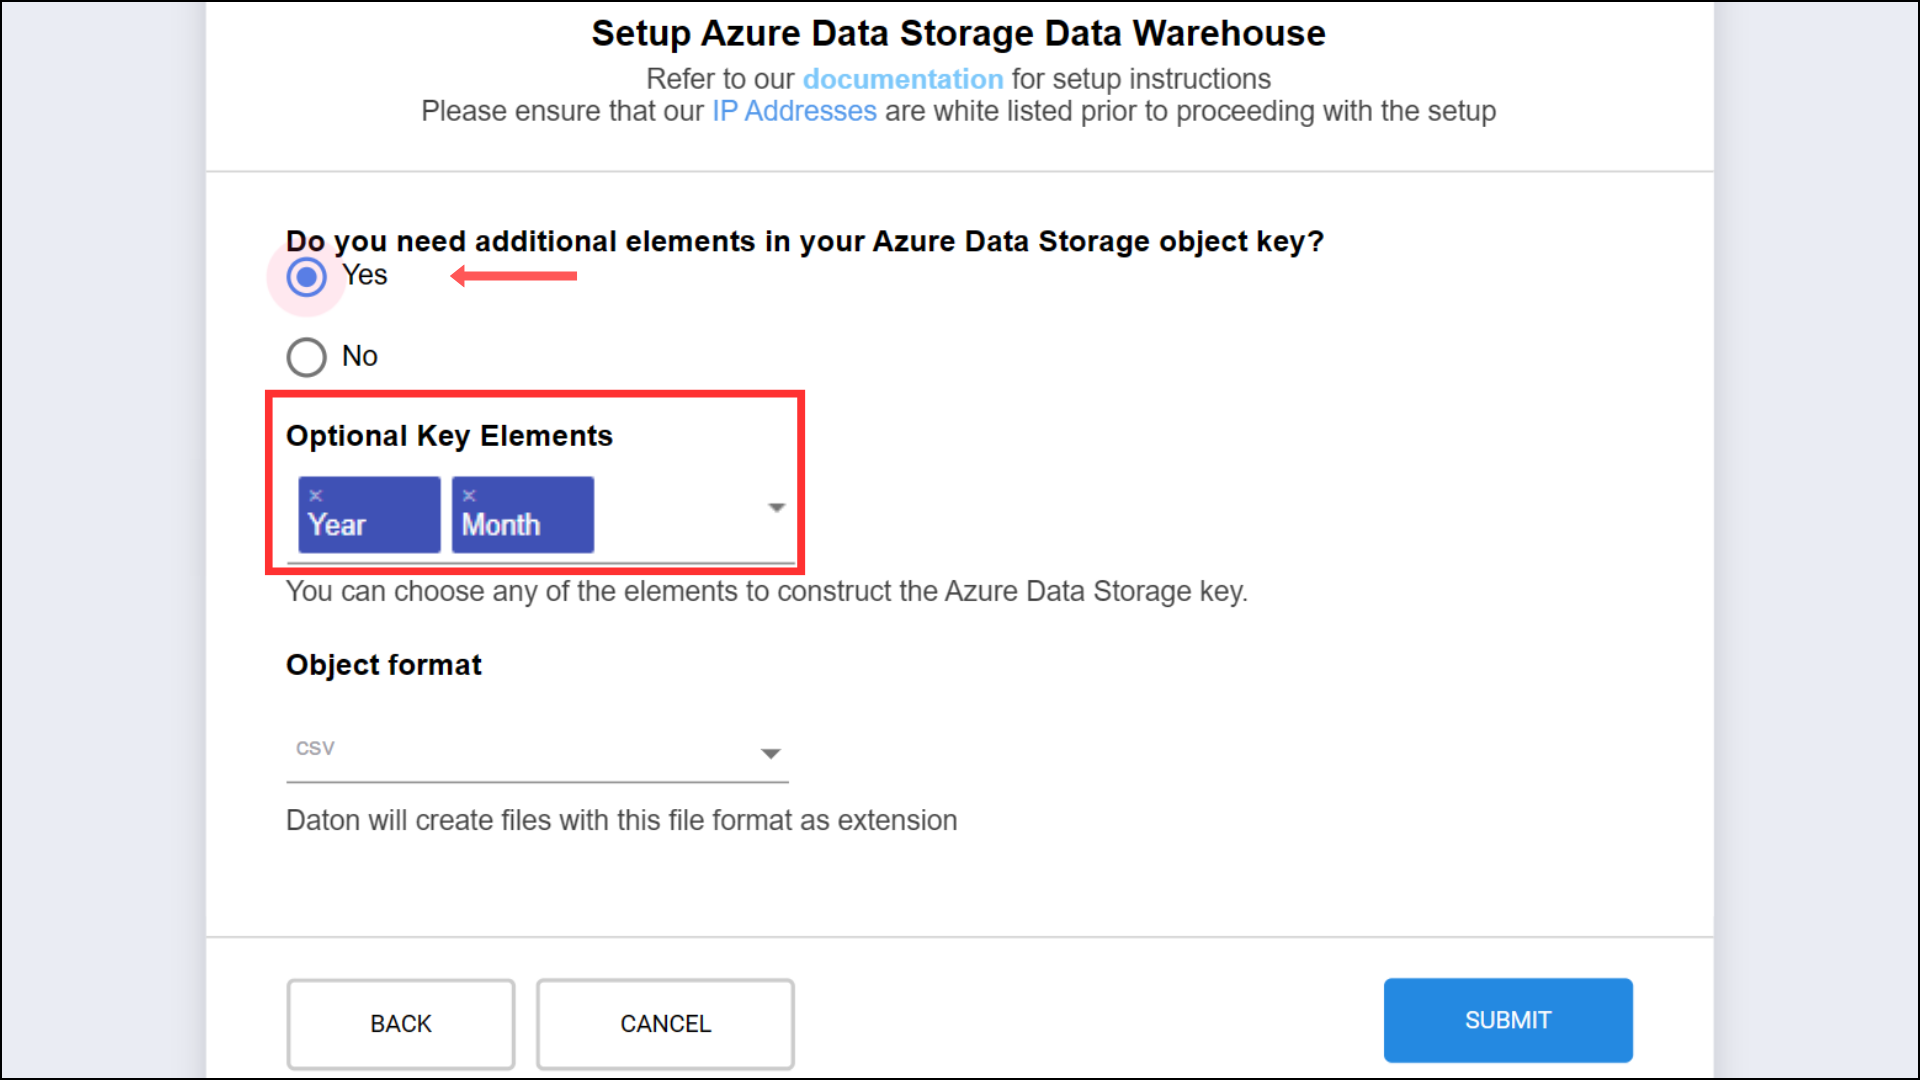
- If No, proceed.

-
Select the Object Format of your choice from the dropdown menu.
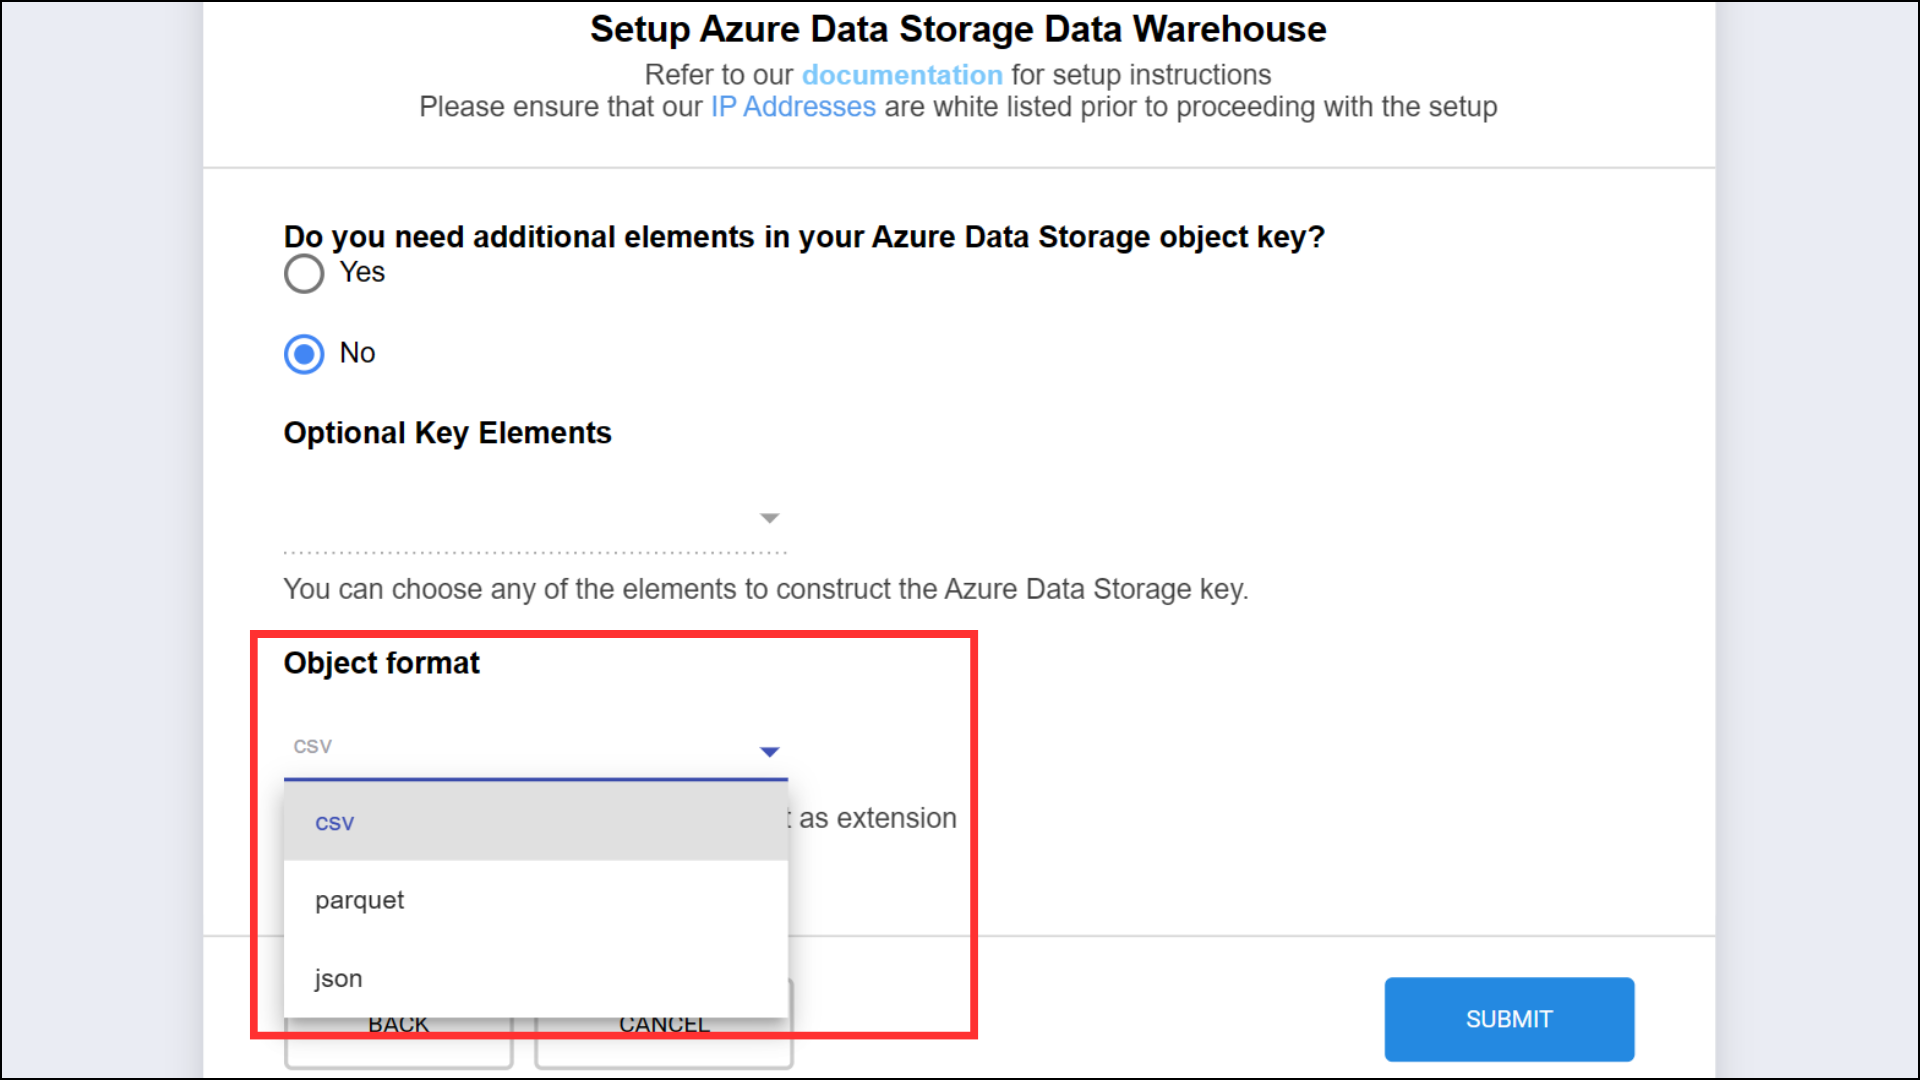 Now hit the Submit Button. A message will confirm successful integration.
-
If Yes, Select Optional Key Elements from the dropdown menu.
Your Azure Data Lake Storage is now configured as a destination in Daton.