Set up Instructions for RDS PostgreSQL Destination
This subtopic provides step-by-step instructions to integrate an Amazon RDS for PostgreSQL database with Daton as a destination, detailing the prerequisites and the integration process.
Set up Instructions for RDS PostgreSQL Destination
This subtopic provides step-by-step instructions to integrate an Amazon RDS for PostgreSQL database with Daton as a destination, detailing the prerequisites and the integration process.
Setting up access to your PostgreSQL data warehouse is not very complicated and just takes a couple of simple steps.
Follow the steps below to set it up for yourself, if you are stuck somewhere, feel free to contact out support team at support@sarasanalytics.com.
Prerequisites
Before you get started, ensure you have the following:
- Active Daton and AWS account
- Administrative user for your AWS account to create or configure a Daton-specific RDS PostgreSQL database
Set up on PostgreSQL
Task 1: Configure a VPC security connection for Amazon RDS PostgreSQL
- Log in to your AWS account.
- On the VPC dashboard, choose Create VPC.
- For Resources to create, choose VPC and more and perform the following:
- Name the VPC.
- Provide the details according to custom requirements and set the rest to default.
You will now be able to visualize the relationships between the VPC resources you've configured. - When you are finished configuring your VPC, choose Create VPC.


- Your VPC connection is set.

Task 2: Create and Connect to an RDS PostgreSQL Database Instance
Create a Subnet group for the database
- Navigate to the RDS in the Amazon Console.
- Navigate to the Subnet groups section and click Create DB subnet group.
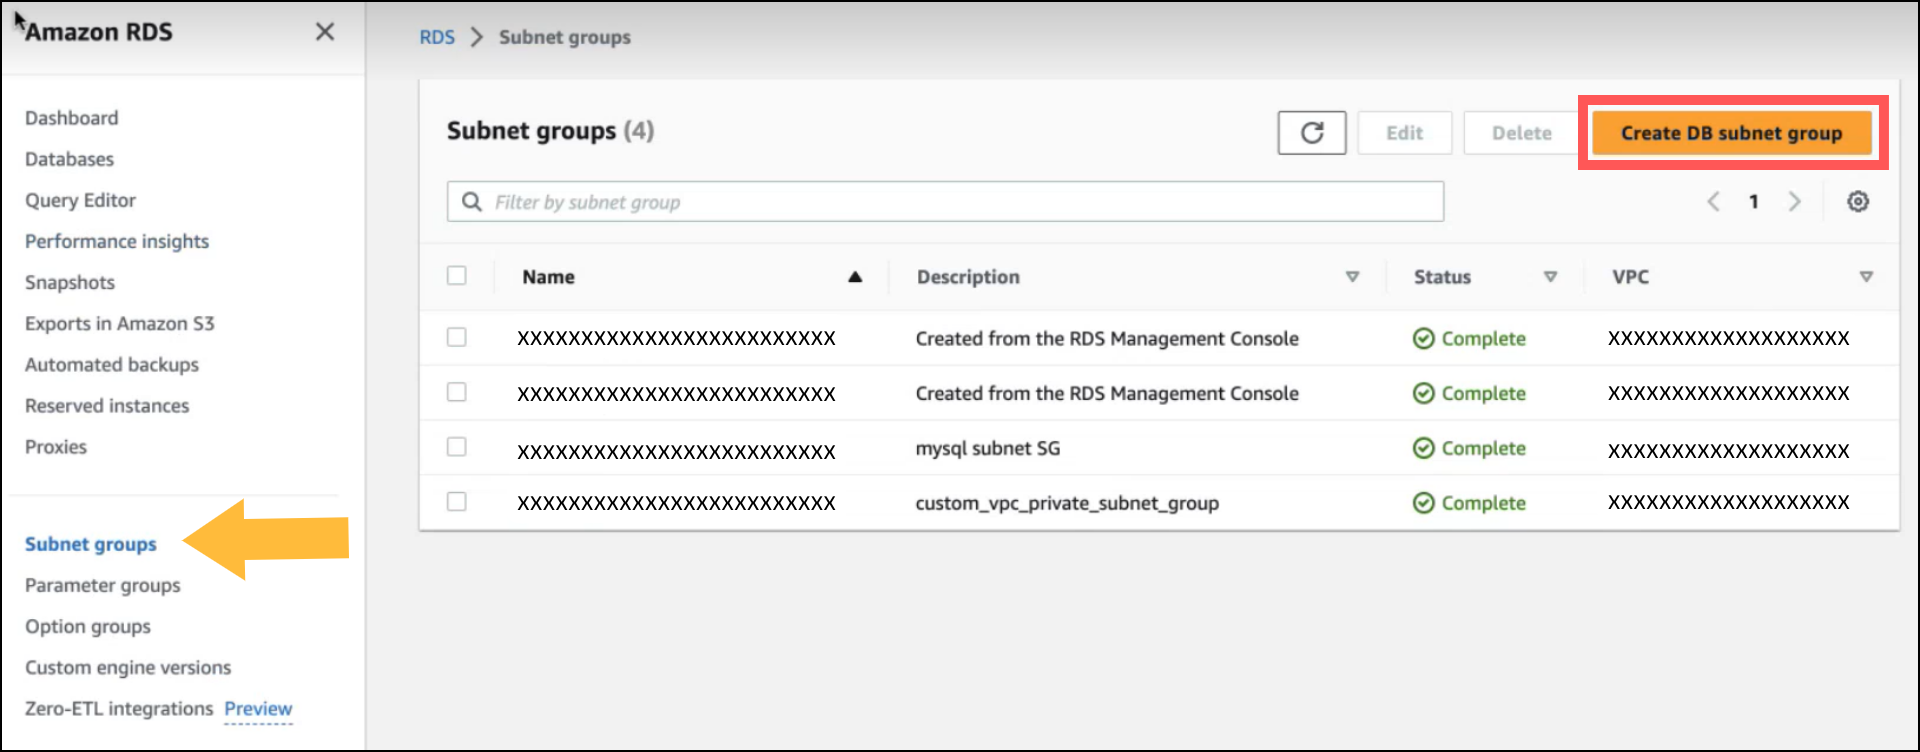
- On the DB subnet creation page, perform the following:
- Provide your Subnet group name and description.

- Select the above-created VPC identifier.

- Add Availability zones and Subnets, and click Create.
While choosing the Subnets, please ensure to exclusively select the private subnets.
- Provide your Subnet group name and description.
- A Subnet group has been created.

Create a PostgreSQL Database
- In the Amazon RDS navigation pane, choose Databases.
- Choose Create database and perform the following:
- Select the Engine type as PostgreSQL and the Template as Free tier.

- Provide a Name in the DB instance identifier, a Master username, and create a Master Password.

- In the Instance configuration section, set Burstable classes to db.t3.micro.
This can be configured as per your specific requirements.
- In the Storage section, select the fields as per requirement.
It is recommended to set the Storage Type to General Purpose SSD (gp2)..png?alt=media&token=9ae08450-d26d-4833-b9d0-4e20ef9e4d3d)
- In the Connectivity section,
- Select Don't connect to an EC2 compute resource
- Select the above-created VPC and DB subnet groups
- Set the Public access to No
- Create a new VPC security group for firewall purposes, Name it, and Select an Availability Zone according to your preferences.
- Check the Create an RDS Proxy checkbox.
Keep the rest as default or customize according to your requirements..png?alt=media&token=358edd95-3af9-4134-b662-ba3c2814d565)
- Select the Engine type as PostgreSQL and the Template as Free tier.
- vi. Select your Database Authentication method, Monitoring preferences, and Additional Configuration as per your requirements.

3. Now check your Estimated Monthly cost and click on Create Database. A new Database will be successfully created.
The steps laid out above are a pre-requisite before you start configuring PostgreSQL as a destination in Daton.
Note
If you wish to connect the destination using Proxy Server or SSH Tunnel, from here on, follow the steps mentioned in this document instead:
Set up on Daton
1. Login to Daton web-app.
2. Click on the connectors tab, then go to destination.
3. Find RDS PostgreSQL & click on configure.
4. Enter any integration name, then click on next.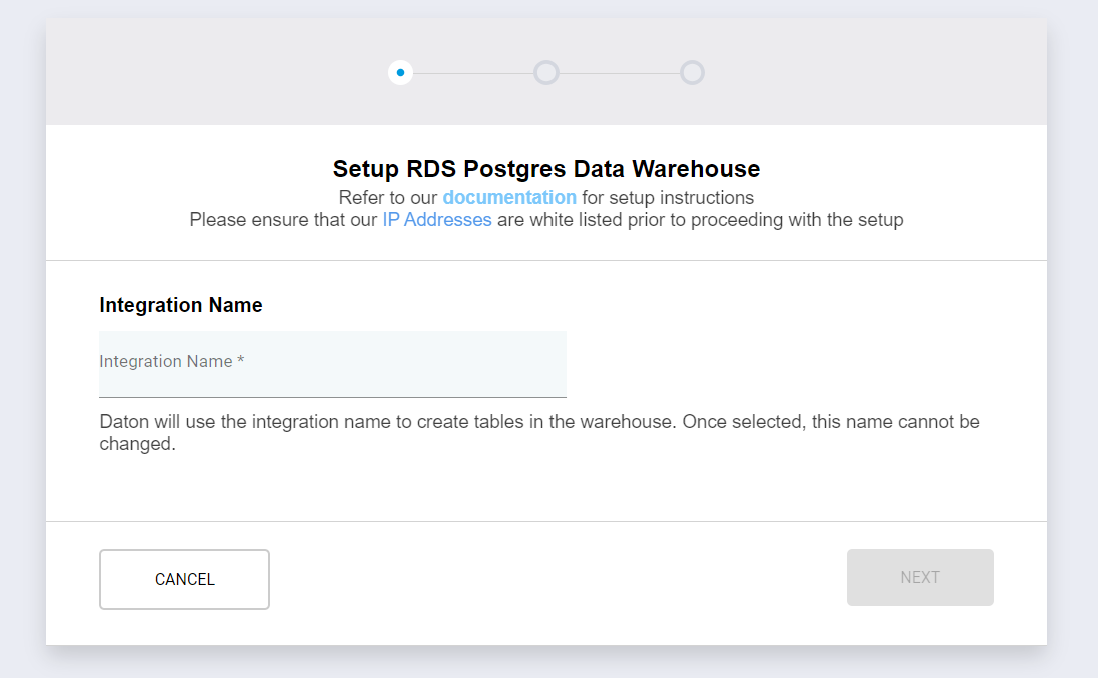
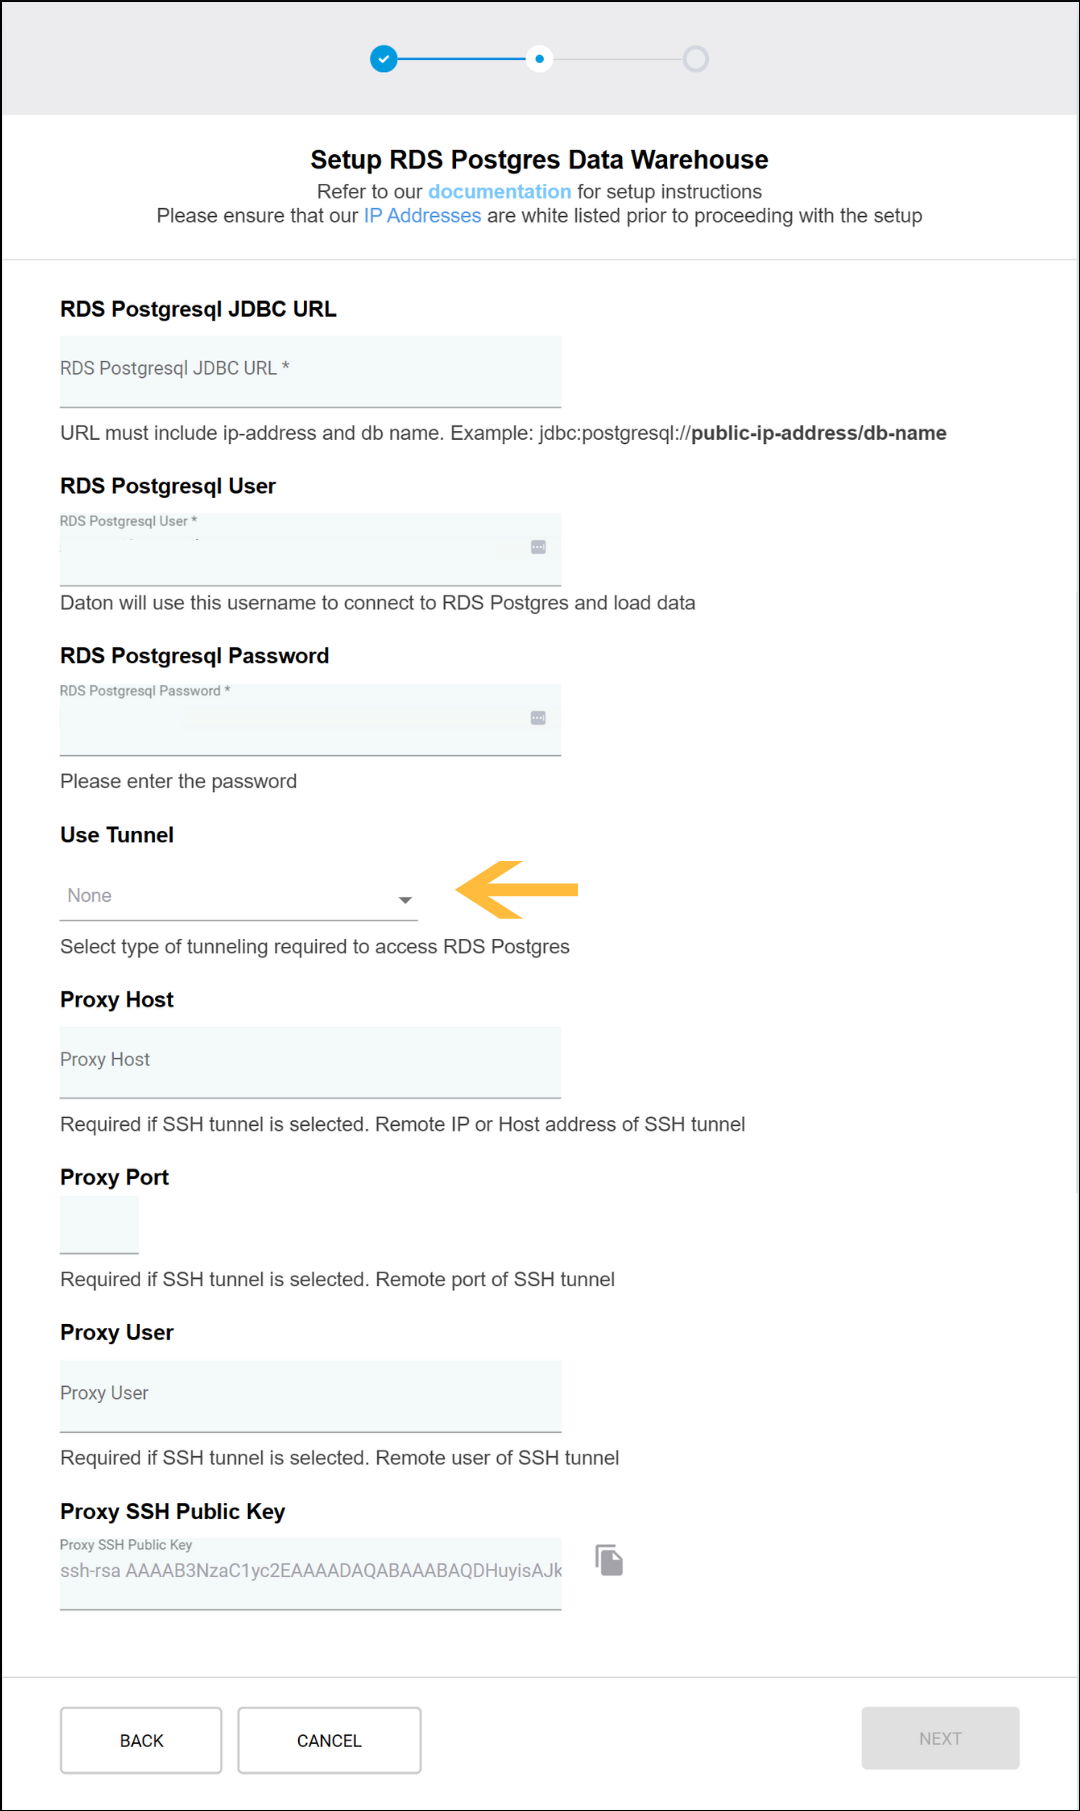
5. Enter the following credentials to configure your warehouse:
- RDS PostgreSQL JDBC URL in the format:
jdbc:postgresql://AmazonRDSPostgreSQL_Database_Endpoint:3306/your_db_name - RDS PostgreSQL Master Username and Password.
- Select Use Tunnel as None.
- Click on next.
6. Select the Schema of your choice.
.png?alt=media&token=092039e1-104a-4b53-afa8-ebaf6f2b0765)
7. Now hit Submit to complete the setup.