Amazon Vendor Central: Setup Instructions
Amazon Vendor Central: Setup Instructions
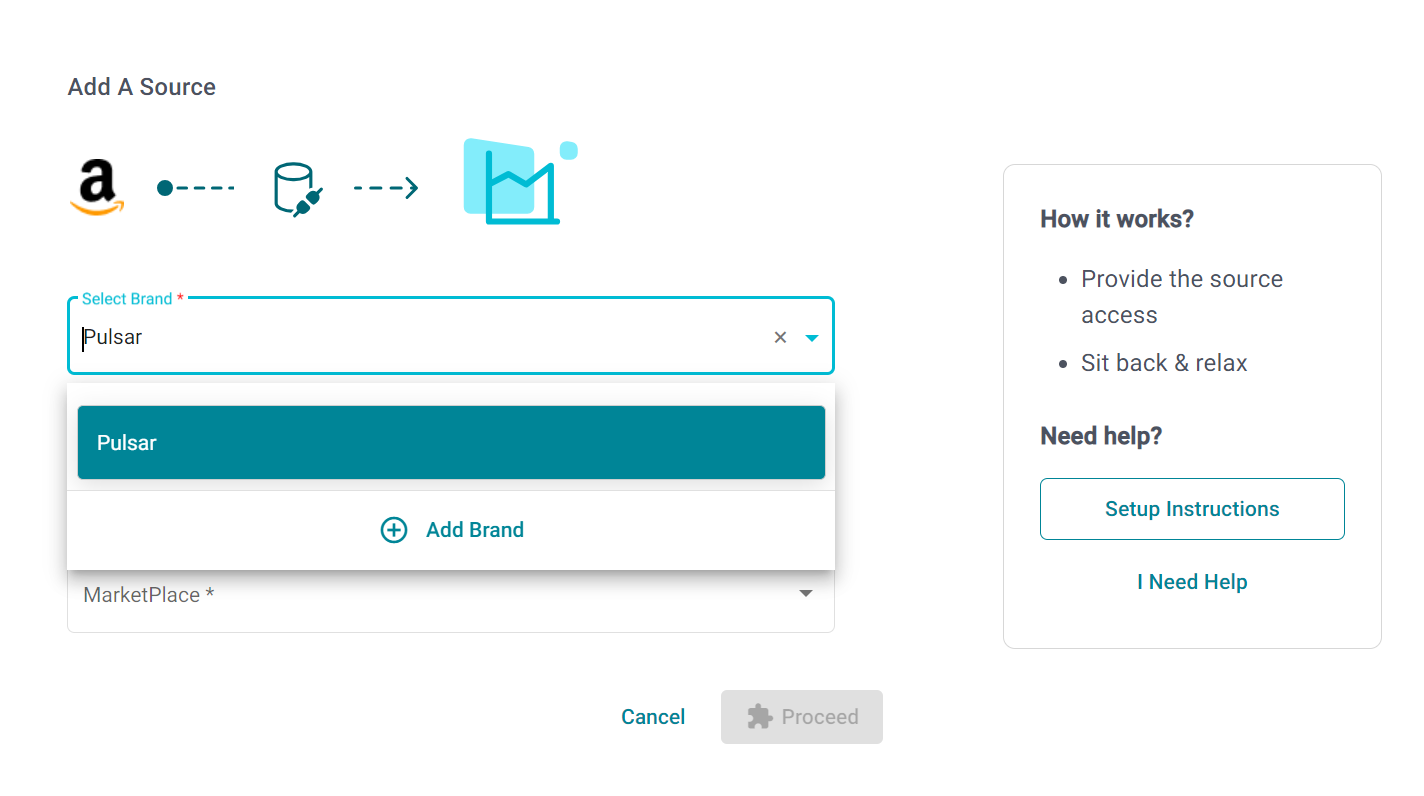
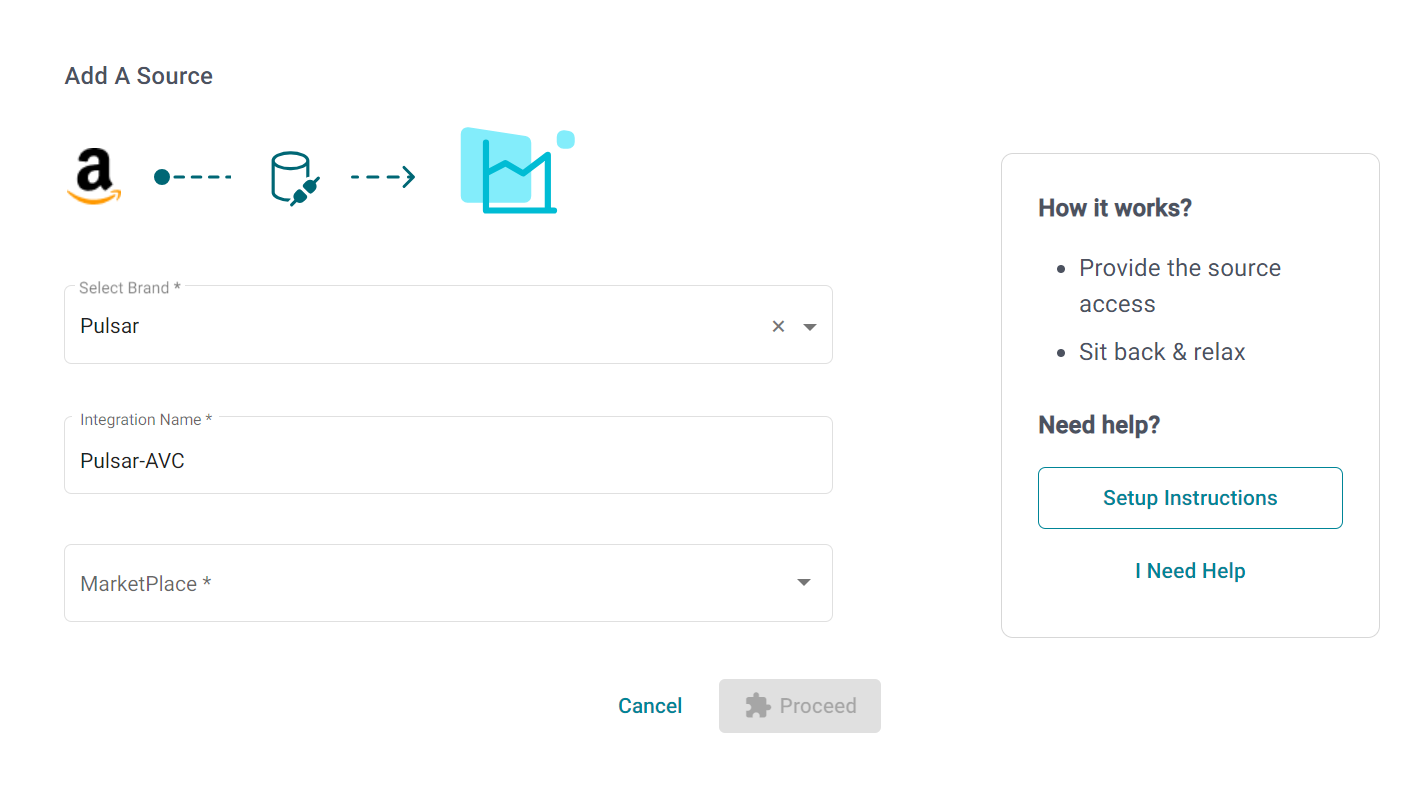
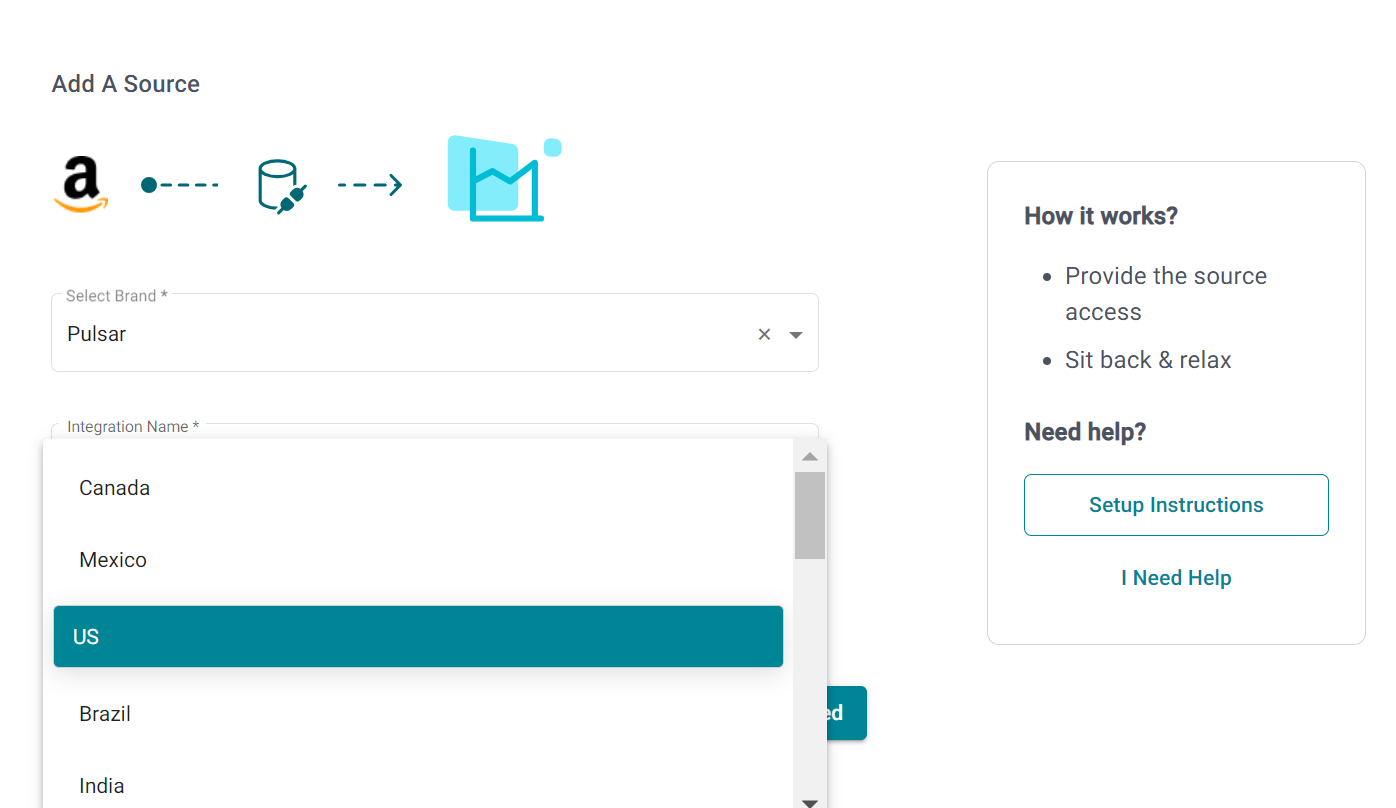
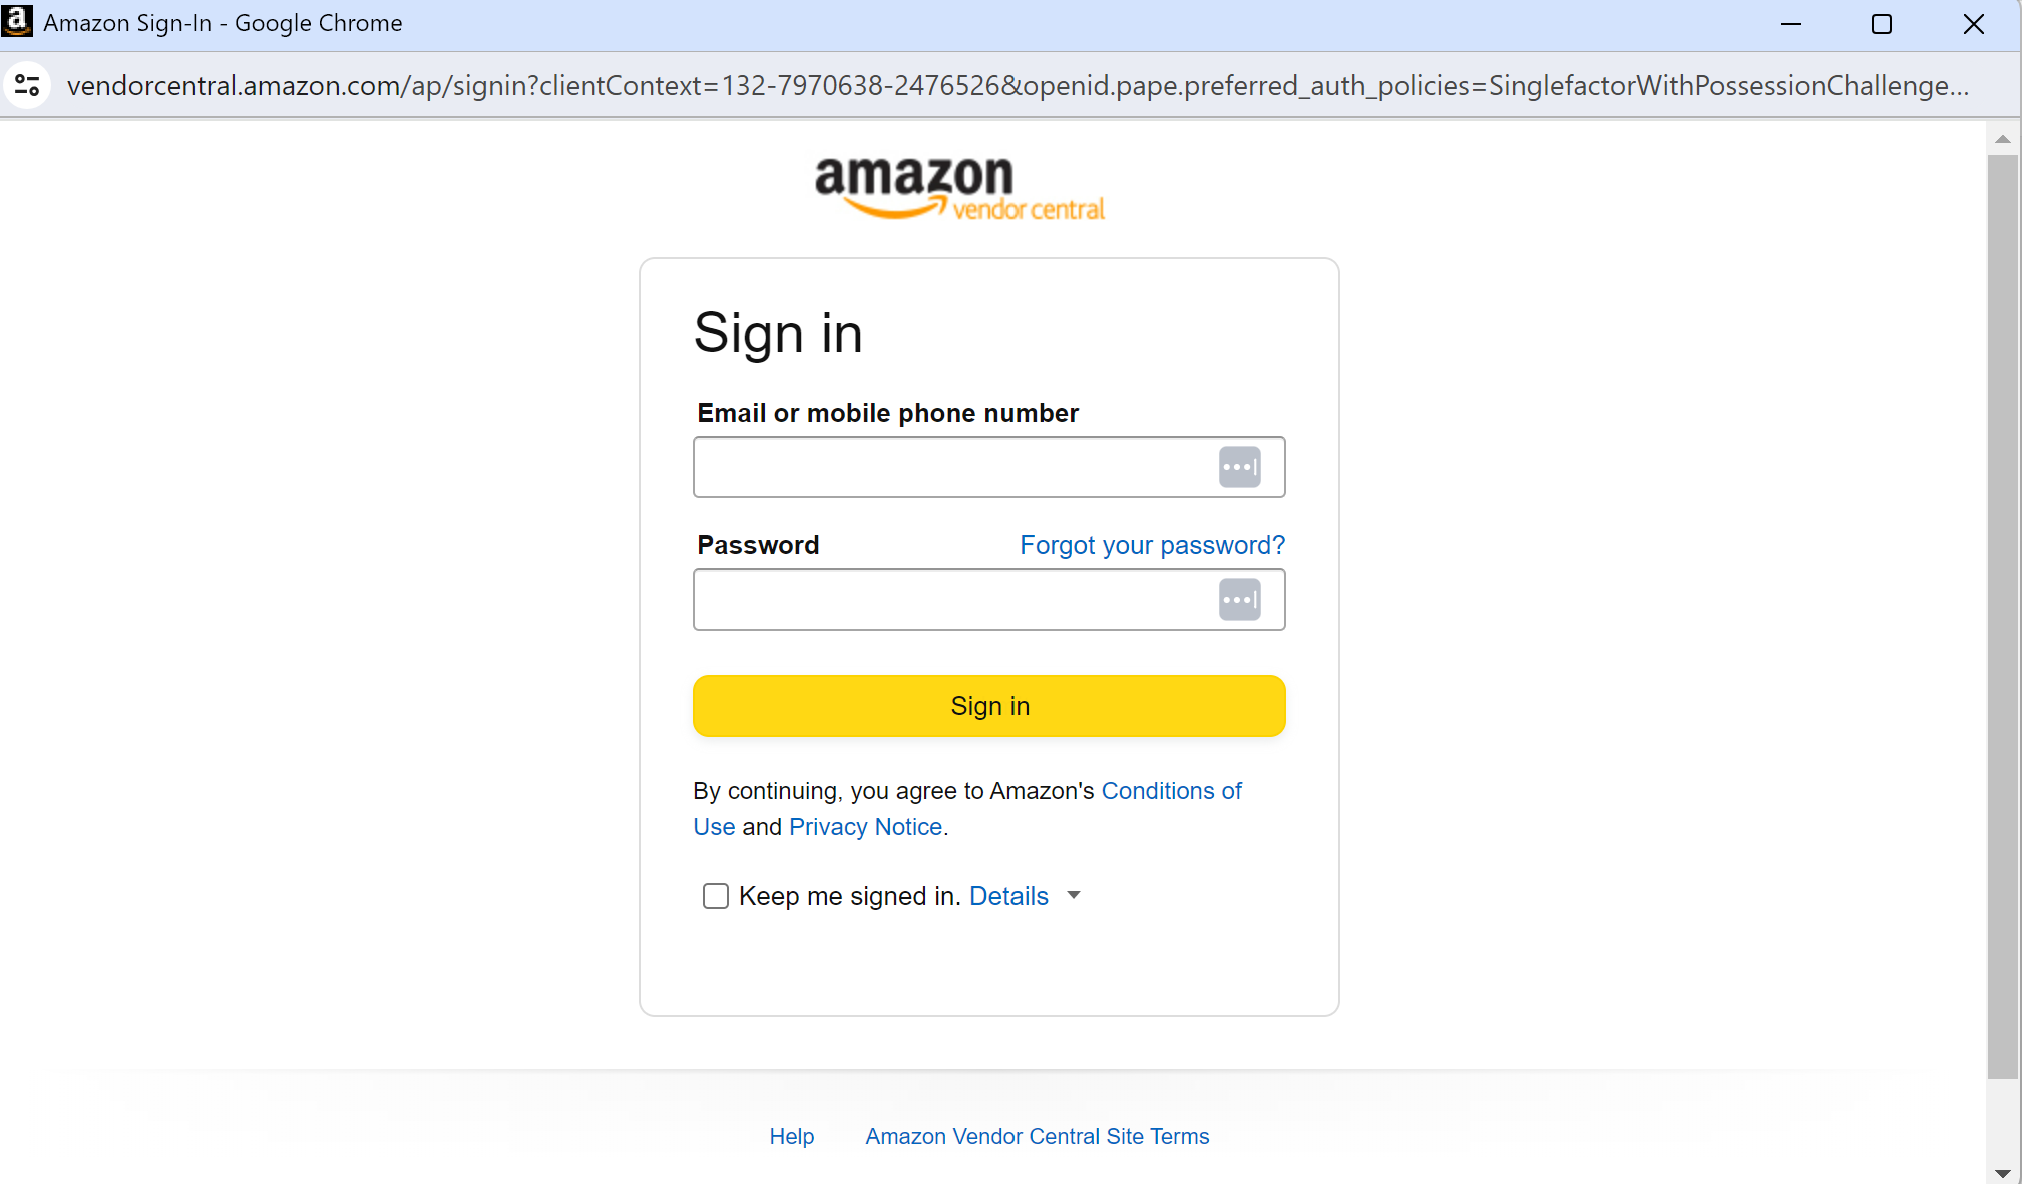
Setting up the integration
1. Select from an existing brand or add a new one by clicking on “Add Brand”
2. Provide a name for the integration, this will help you identify it later.
3. Select a Marketplace. Then Click on Proceed.
4. Log in to your amazon Vendor Central account using your credentials.
5. Select the account and marketplace that is related to the brand selected in step 1.

6. Give Daton the permission to access your account.
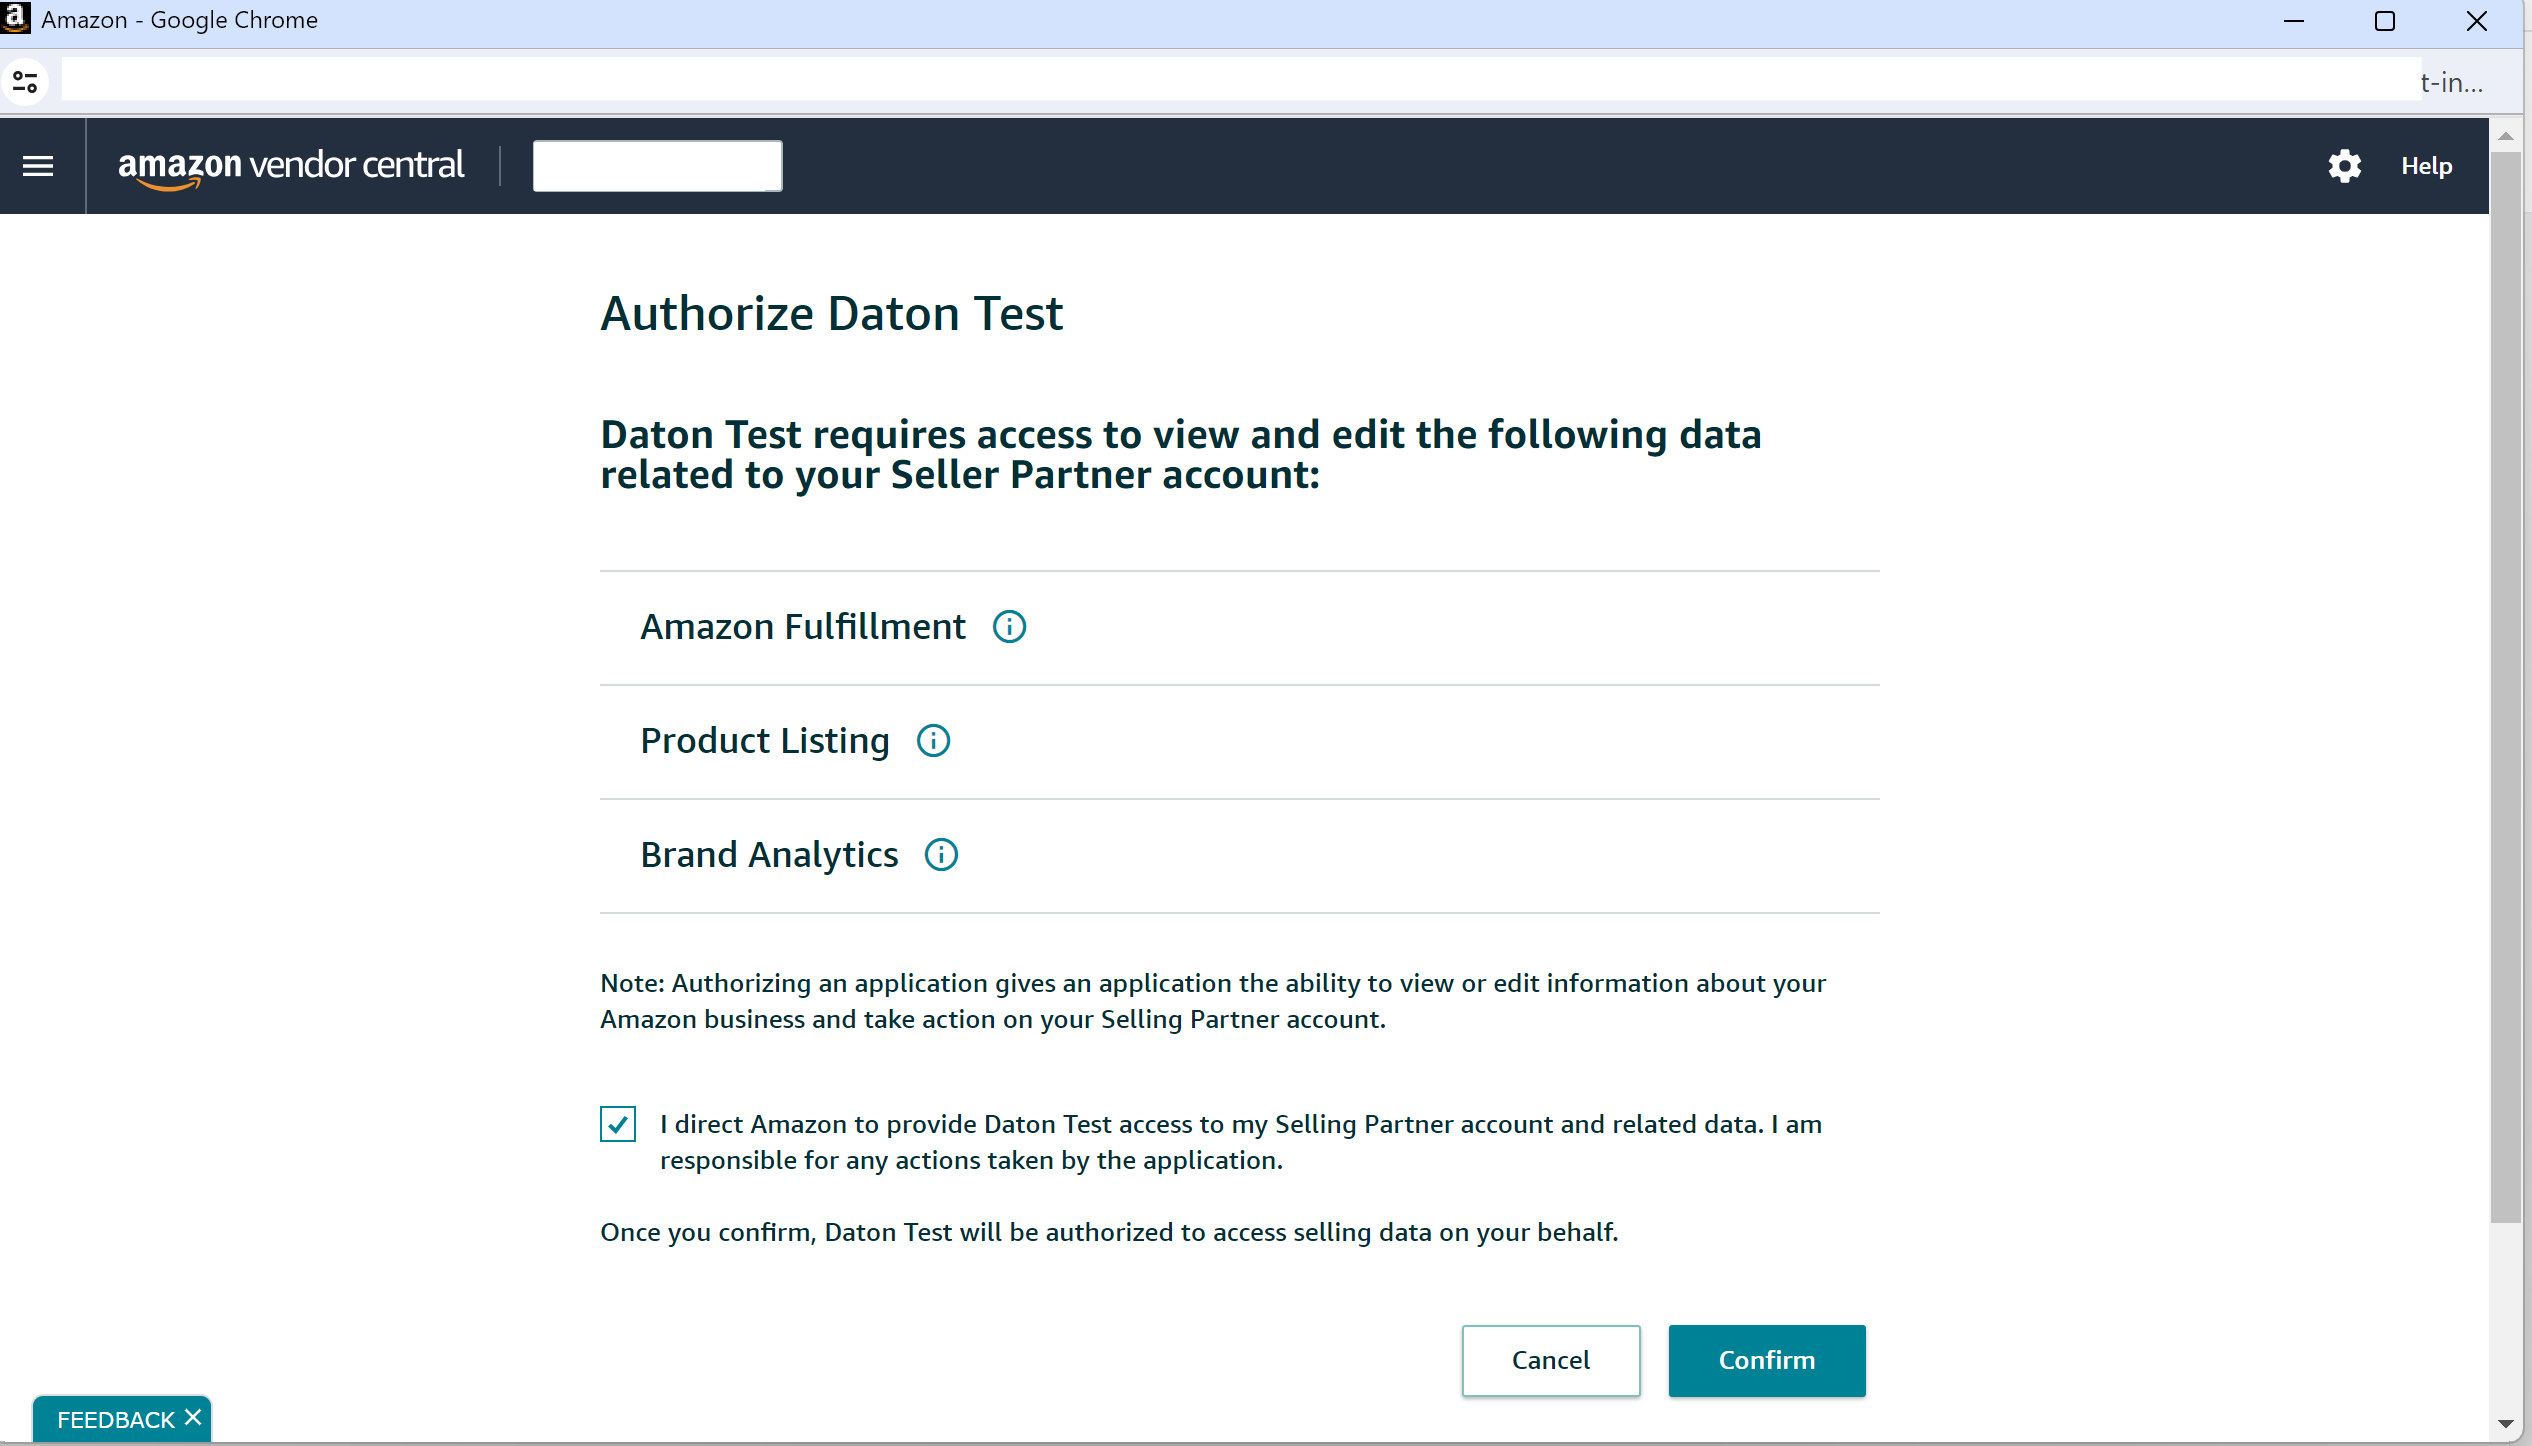
Click on confirm to create your Vendor Central integration.