Setup Instructions for Snowflake
Setup Instructions for Snowflake
Setting up access to your Snowflake data warehouse is not very complicated and just takes a couple of simple steps.
Follow the steps below to set it up for yourself, if you are stuck somewhere, feel free to contact out support team at support@sarasanalytics.com.
Prerequisites
- Active Daton and Snowflake Account
Set up on Snowflake
Task 1: Whitelisting Daton IPs in Snowflake
Although this step is optional, we highly recommend that you whitelist our IPs to allow Daton to access your Snowflake account securely, you’ll need to create a new network policy or add Daton IP addresses to a network policy that you’ve whitelisted. You can do this using the management console or using SQL.
[Old UI]
- From the Snowflake management console, click Accounts and then Policies
- Make sure you have ACCOUNTADMIN or SECURITYADMIN privileges
- Click Create a New Network Policy
- Name the policy and then enter the following IP addresses:
- 35.238.200.205/32
- Click Finish

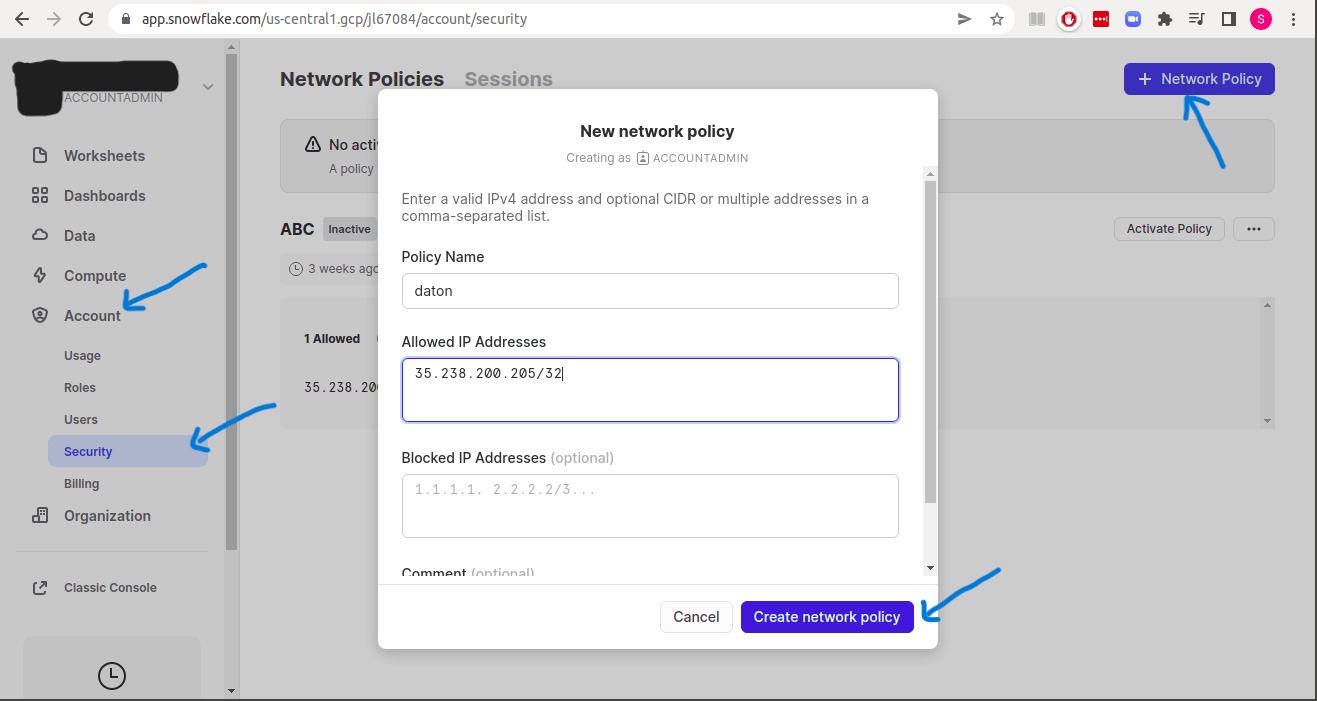
[New UI]
- 1From the Snowflake management console, click Accounts and then Security
- Make sure you have ACCOUNTADMIN or SECURITYADMIN privileges
- Click + Network Policy
- Name the policy and then enter the following IP addresses:
- 35.238.200.205/32
- Click Create Network policy
You can also whitelist Daton IP addresses using SQL
Use the following SQL:
CREATE NETWORK POLICY DATON_WHITELIST ALLOWED_IP_LIST= ('35.238.200.205/32') BLOCKED_IP_LIST= () COMMENT = ‘DATON_IP_ADDRESSES' ;
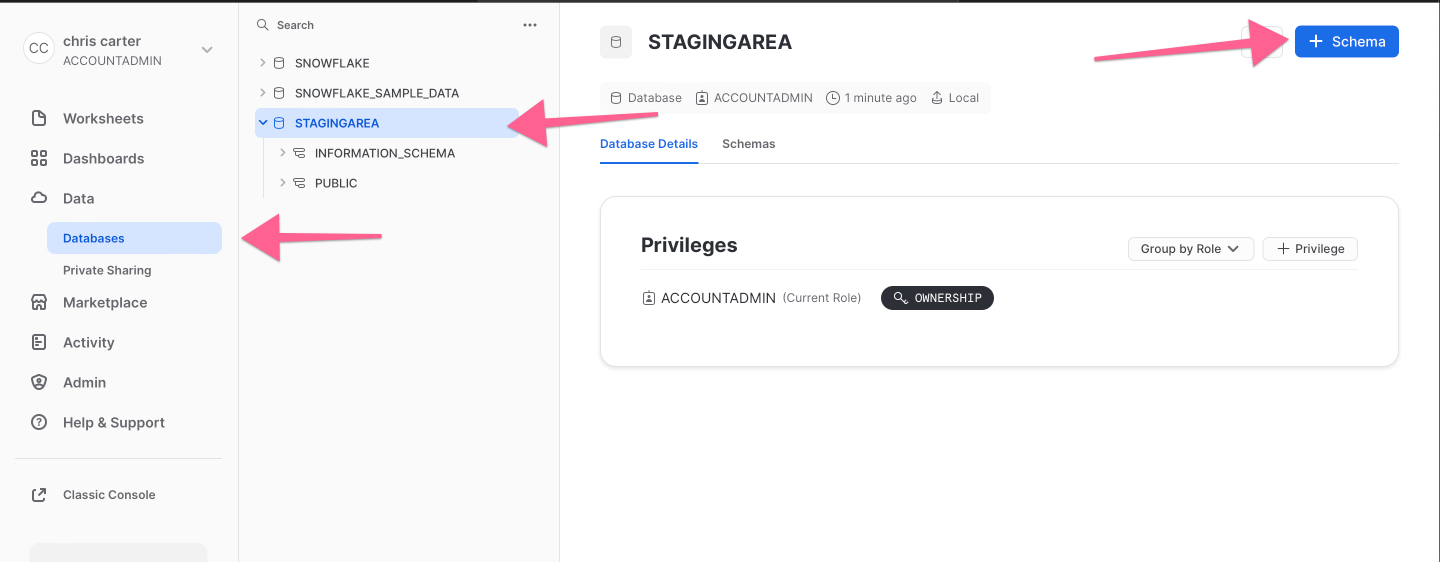
Task 2: Create a new database to load the data into Snowflake (Optional)
You can skip this step if you already have your database set up.


Task 3: Create a new Schema in the Database (Optional)

Task 4: Issues grants to enable Daton to connect to Snowflake
Please issue the following grants to the chosen Role:
GRANT USAGE ON WAREHOUSE <warehouse_name> TO <RoleName>;GRANT CREATE SCHEMA, MONITOR, USAGE ON DATABASE <DBName> TO <RoleName>;GRANT USAGE ON SCHEMA <DBName>.<SchemaName> TO <RoleName>;GRANT CREATE TABLE ON SCHEMA <DBName>.<SchemaName> to <RoleName>;GRANT CREATE STAGE ON SCHEMA <DBName>.<SchemaName> to <RoleName>;GRANT CREATE FILE FORMAT ON SCHEMA <DBName>.<SchemaName> to <RoleName>;
For this instance;
GRANT USAGE ON WAREHOUSE <Snowflake> TO <AccountAdmin>;GRANT CREATE SCHEMA, MONITOR, USAGE ON DATABASE <StagingArea> TO <AccountAdmin>;GRANT USAGE ON SCHEMA <StagingArea>.<Raw> TO <AccountAdmin>;GRANT CREATE TABLE ON SCHEMA <StagingArea>.<Raw> to <AccountAdmin>;GRANT CREATE STAGE ON SCHEMA <StagingArea>.<Raw> to <AccountAdmin>;GRANT CREATE FILE FORMAT ON SCHEMA <StagingArea>.<Raw> to <AccountAdmin>;
The steps laid out above are a pre-requisite before you start configuring Snowflake as a destination in Daton.
Set up on Daton
1. Log in to your Daton account and navigate to the Destinations page.
2. Click the Add New Destination button and select Snowflake from the list of options.
3. Enter the integration name. Daton will use the integration name to create tables in the data warehouse.
We have transitioned to key pair authentication in Daton to comply with Snowflake's mandatory Multi-Factor Authentication (MFA) requirements for users. For more details, please refer to our Snowflake Key Pair Authentication FAQ.
4. If you want to regenerate the key pairs, then set the "Regenerate Public Key Pair" dropdown to TRUE or else to retain the same keys, keep it as FALSE. The change will be affected only when you edit the destination.

4. Enter your warehouse connection details like the host URL and the snowflake user created for Daton.

5. Once you have created the user in Snowflake, you should copy the public key shown in the page and run the below command in Snowflake
ALTER USER <<your_user_name>> SET RSA_PUBLIC_KEY='your_public_key_here';
ALTER USER <<your_user_name>> SET TYPE = SERVICE;
Note: If the public key is not updated to the Snowflake user you will find the below error message when you go to next step. Follow step 5 to avoid this.
Error - JWT Token is invalid
Once you have completed the above step, click on Next.
Now Daton scans the warehouse permissions for the user and return a list of data warehouses the user has access to.
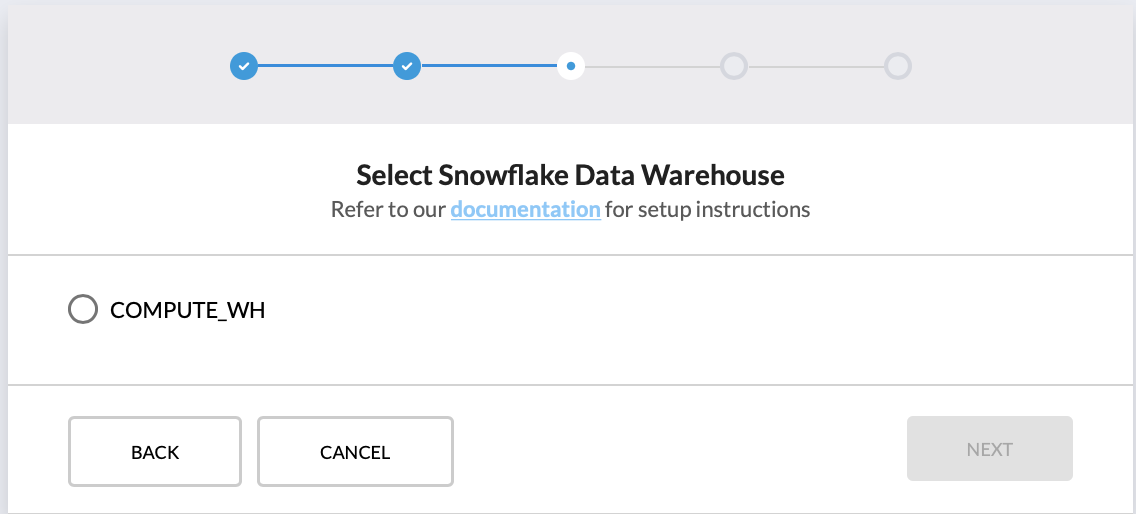
6. Select the warehouse
Daton scans the warehouse permissions for the users and return a list of data warehouses the user has access to.
COMPUTE_WH is the default warehouse created by Snowflake. Select the data warehouse of your choice.
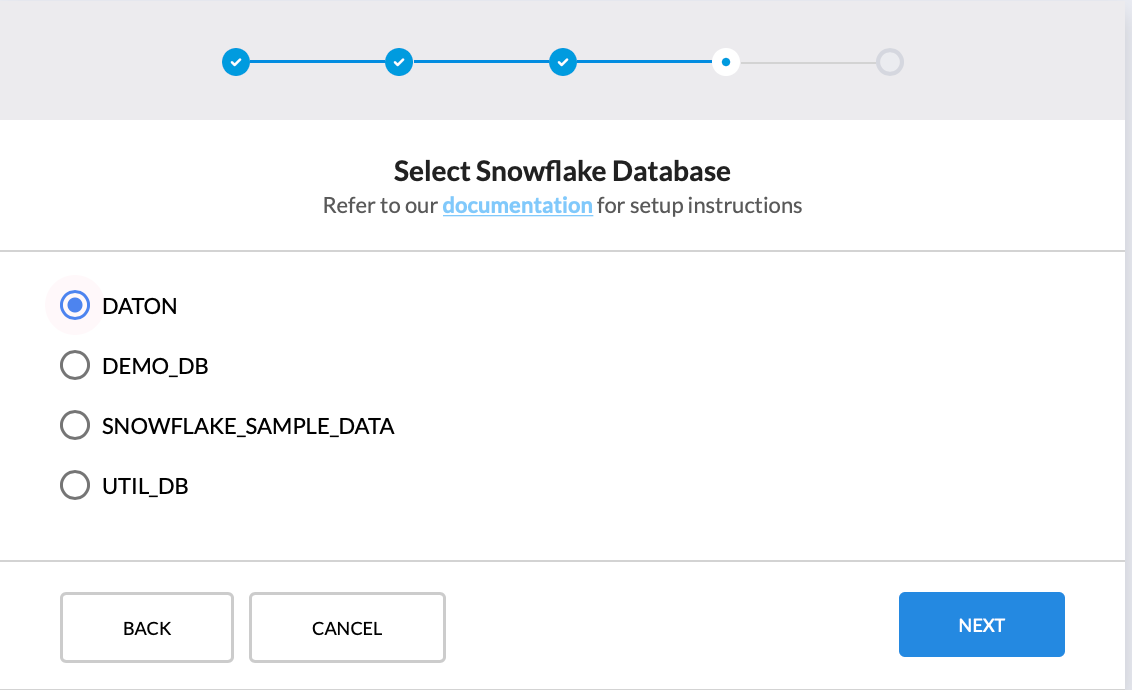
7. Select the database
In this step, Daton lists databases in the selected warehouse to which the user has access.
8. Select the schema. In this step, Daton lists schemas in the selected databases to which the user has access.
Please note that Daton does not create schema in Snowflake. We recommend to use a dedicated schema for Daton to replicate data.

9. Click on Submit.
That is all you need to do to setup a Snowflake data warehouse on Daton. Continue to configure your sources, sit back, and let Daton take care of the data replication for you.
Reach out to us on support@sarasanalytics.com if you have any issues.