Documentation

Contact Us

If you still have questions or prefer to get help directly from an agent, please submit a request.
We’ll get back to you as soon as possible.

Please fill out the contact form below and we will reply as soon as possible.

  • Talk To sales
  • Start Trial

How to Integrate Amazon Aurora with Daton

Contact Us

If you still have questions or prefer to get help directly from an agent, please submit a request.
We’ll get back to you as soon as possible.

Please fill out the contact form below and we will reply as soon as possible.

  • Saras Pulse

    • Saras Daton

      • Saras IQ

        Need help with something?

        Talk to data expert

        How to Integrate Amazon Aurora with Daton

        This subtopic provides step-by-step instructions to create Amazon Aurora integrations in Daton, detailing the prerequisites, the integration process, and important notes.

        Prerequisites

        Before we get started, make sure you have:

        • An AWS Aurora and a Daton account
        • AWS Aurora Host Name
        • AWS Aurora Port Number
        • AWS Aurora User Name
        • AWS Aurora User Password
        • AWS Aurora Database Name

        Integrate your Amazon Aurora MySQL Database with Daton

        1. ​Log in to your existing Daton account and search for Amazon Redshift in the list of Connectors, then click Configure.
        2. Enter the following details and click Authenticate: 
          • Integration Name 
          • Replication Frequency 
          • Replication Start Date

            Note that the Integration Name will be used to create the integration tables and cannot be modified later.
        3. Select your Amazon Aurora Database Schema(s) data to be replicated. For the same, provide the following credentials and click Next. 
          • AWS Aurora Host Name
          • AWS Aurora Port Number
          • AWS Aurora User Name
          • AWS Aurora User Password
          • AWS Aurora Database Name

            You can also secure your authentication by SSH tunneling. 

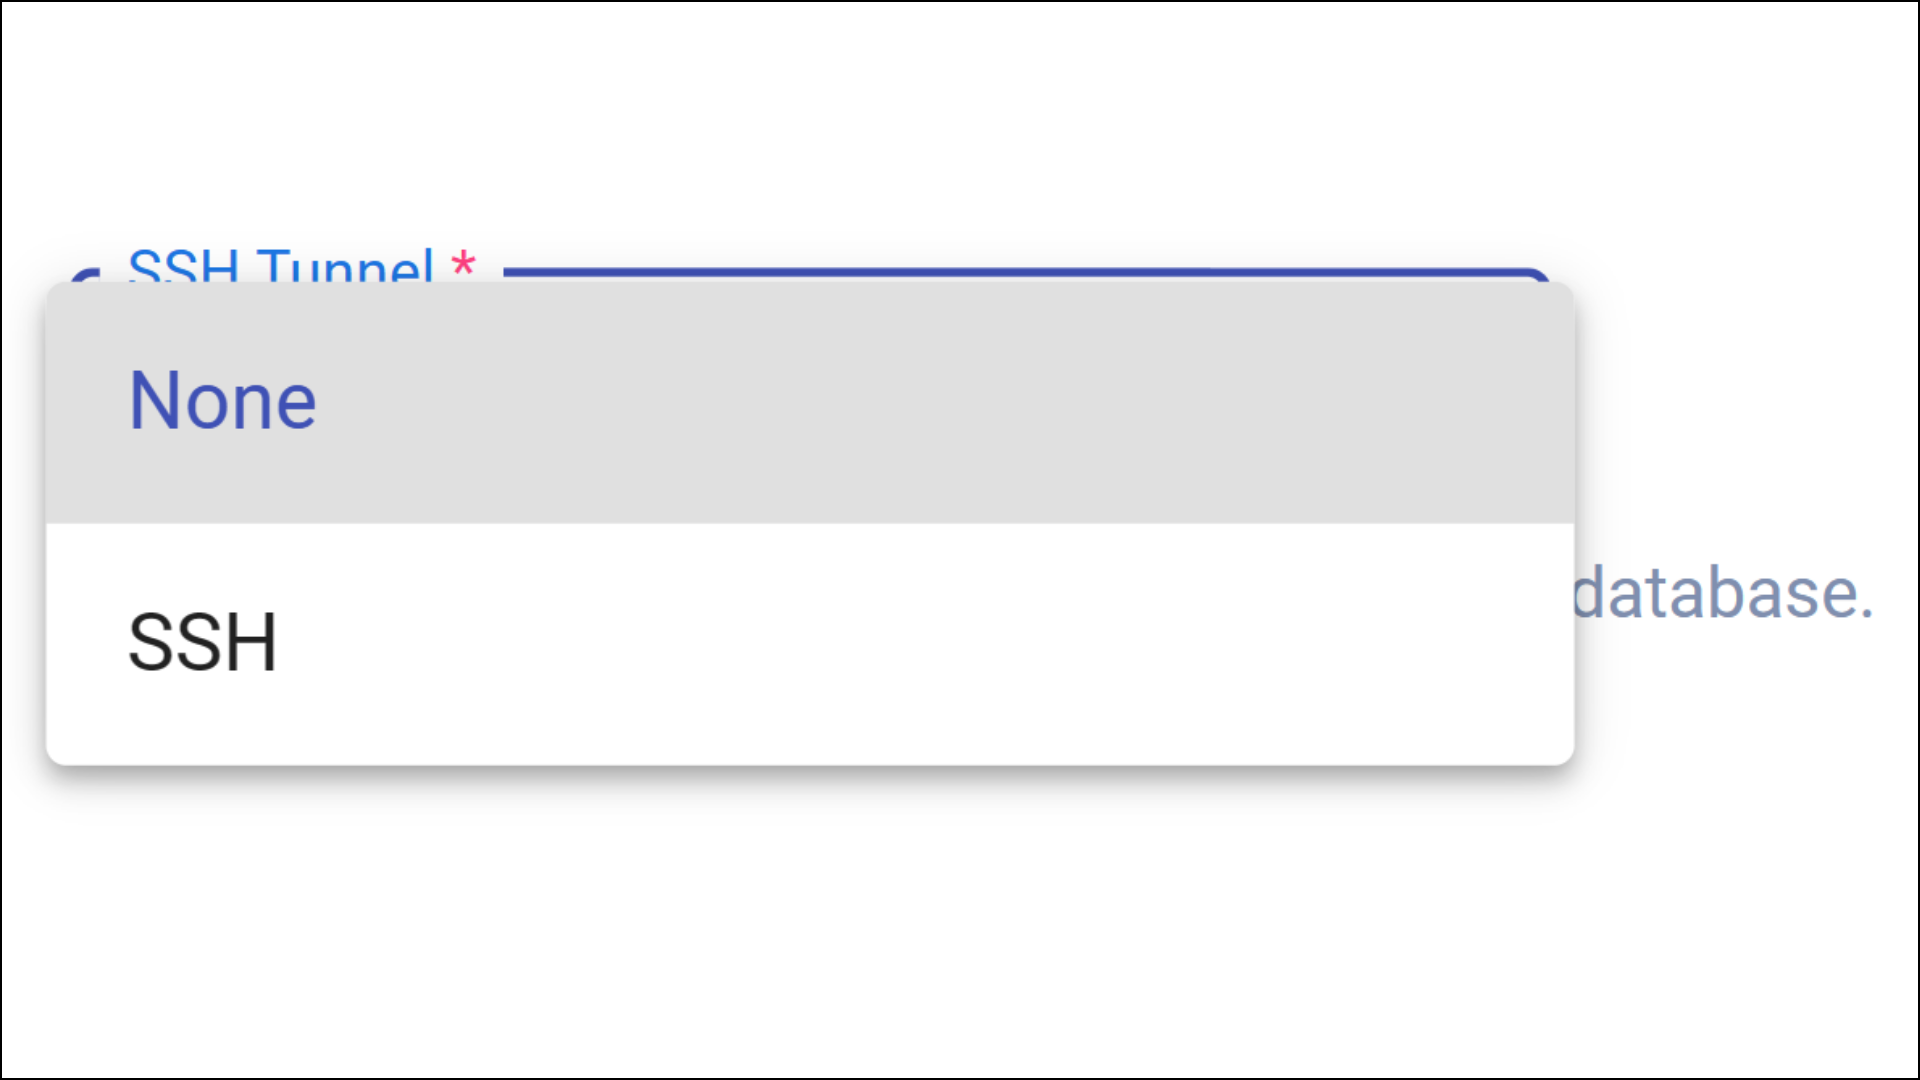
            For further information, refer to the FAQs section on ​"How to Enable SSH Tunneling during a Database Source Authentication?"
        4. Post Database Authentication, you will be prompted to choose schemas from the list. Select the desired Schemas and click Next.
        5. Select all the Tables as per requirement and Configure the schema that you wish to create in the destination before clicking the Next button. 
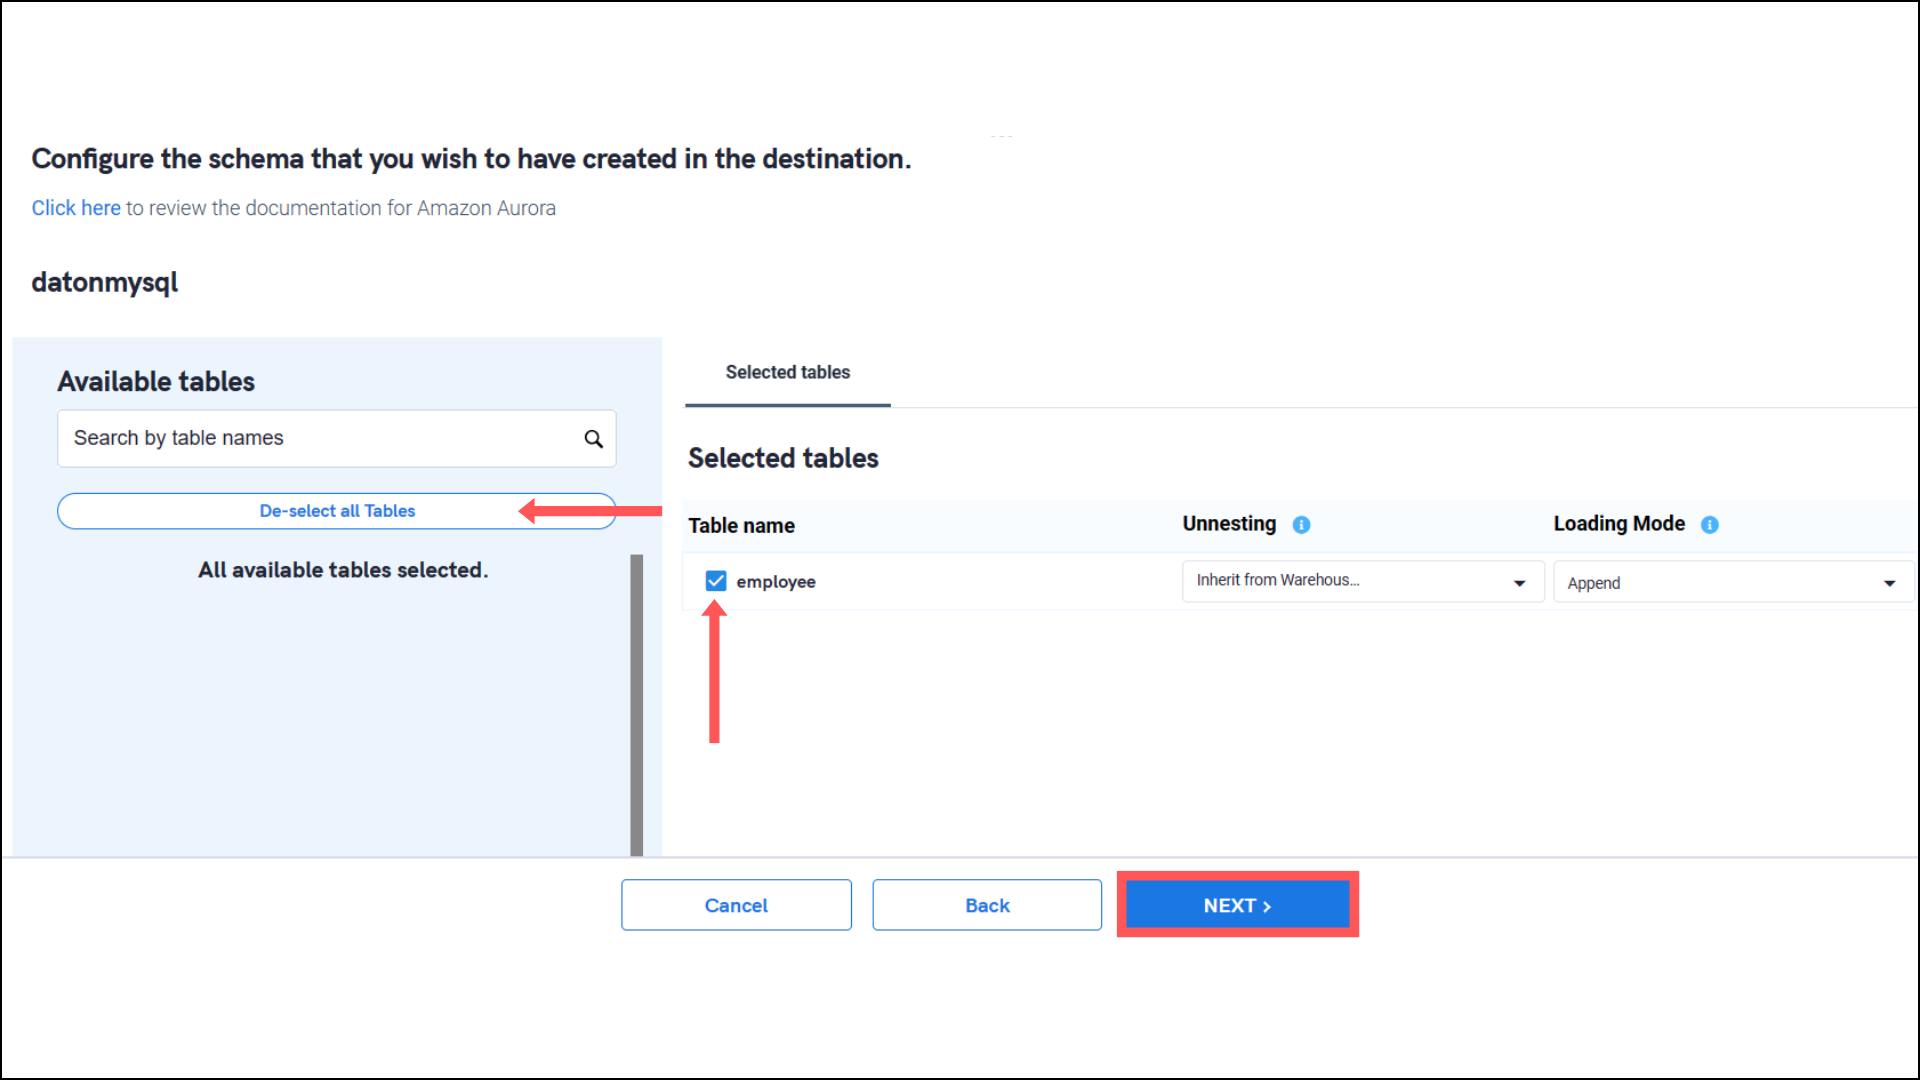
          Note: 
          • You will have to check at least one Table from each of the previously selected Schemas to proceed further. 
          • You can also customize the replication frequency and replication start date of each desired table separately. You may find this functionality under the advanced settings of every selected table.
        6. Select all the Columns you require for each table and Submit the integration.

          It's recommended to select a replication field for each of the tables. Selecting 'None' will lead to full table replication. Learn more about Replication Fields here.

          Note that you will be prompted to select the destination for your Database.
        7. Select the destination for your source and click Confirm. An integration successful message will be displayed.

        Important Note

        • Integrations would begin in the Pending state and change to the Active state once the first job successfully loaded data into the configured warehouse. 
        • Users can check job status and process logs from the integration details page by clicking on the integration name in the active list. 
        • Users can Re-Authenticate, Edit, Clone, Pause, or Delete the integration at any moment by clicking on settings. You can also adjust the frequency and history of the integration. 
        • On the Sources page, click Integration to access each table in your integration. The page also shows the state of each table, the last replicated time, and the Reload access buttons. 
        connect integrate

        Was this article helpful?

        Yes
        No
        Give feedback about this article

        Related Articles

        • Essential Attributes
        • Amazon Aurora MySQL
        • About Amazon Aurora Platform

        Table of Contents

        Prerequisites Integrate your Amazon Aurora MySQL Database with Daton Important Note

        Get Started on your Data Journey Today!

        Get a free 14-day trial of Daton today, no credit card is required.

        Start Free Trial
        Talk To Experts
        • Quick & Easy Setup
        • Secure & Reliable
        • No-Code Platform
        • Auto Updates
        • 24/7 Support

        Follow Us

        Linkedin Youtube

        Company

        • Customers
        • Partner With Us
        • Contact Us

        Culture

        • About
        • People
        • Careers

        Offerings

        • Daton
        • For Brands
        • For Agencies

        Policies

        • Terms of Service
        • Privacy Policy
        • MSA

        Follow Us

        Linkedin Youtube

        DISCLAIMER: Various trademarks are held by their respective owners

        © 2023 sarasanalytics.com

        Sitemap

        Get Started on your Data Journey Today!

        Get a free 14-day trial of Daton today, no credit card is required.

        Start Free Trial
        Talk To Sales
        DISCLAIMER: Trademarks are held by their respective owners
        • Quick & Easy Setup
        • Secure & Reliable
        • No-Code Platform
        • Auto Updates
        • 24/7 Support

        Company

        • Customers
        • Partners
        • About
        • People
        • Careers
        • Contact Us

        Offerings

        • Daton
        • Solution for Brands
        • Solution for Agencies
        • Dashboards
        • Founder's Note
        • Status

        Policies

        • Terms of Service
        • Privacy Policy
        • MSA
        • Sitemap

        © 2023 sarasanalytics.com

        Linkedin Youtube

        Knowledge Base Software powered by Helpjuice

        Expand