Connecting Database using Proxy Server or SSH Tunnel
Connecting Database using Proxy Server or SSH Tunnel
In this documentation you will find steps to connect the following destinations using SSH tunnel, the steps are same for all the destinations given below:
- Amazon RDS MySQL: Complete task 1 and 2, then perform the task given below.
- Amazon RDS PostreSQL: Complete task 1 and 2, then perform the task given below.
- Amazon Redshift: Complete task 1, 2, and 3 then perform the task given below.
Set up on the Destination
Task 1: Launch an EC2 Instance
- On the AWS Management Console, go to the Amazon EC2 console.
- Choose EC2 Dashboard, and then choose Launch instance.

- Provide a Name to the EC2 instance.

- Under Application and OS Images (Amazon Machine Image), choose an AMI of your choice.

- Select the machine option as per your requirement under the Instance type.
- For the Key pair (login), you have two options. If you already have a key pair, just pick its name. If you want a new key pair, click on Create new key pair. Then, follow the steps in the Create key pair window to make the new key pair.

For more information about creating a new key pair, see Create a key pair in the Amazon EC2 User Guide. - In the Network settings section, configure these values while leaving the rest at their default:
- Select the previously created VPC.
- Select one of its Public Subnets.
- Set Auto-assign public IP to Enable.
- Create a Firewall security group and Name it.
.png?alt=media&token=58c10a88-500d-4398-a532-1d84f2dccd68)
- Now check the settings of the EC2 instance for configuration or keep them as default and click on Launch.
A note saying the Instance is successfully launched will appear.
This is how your EC2 instance would look like:
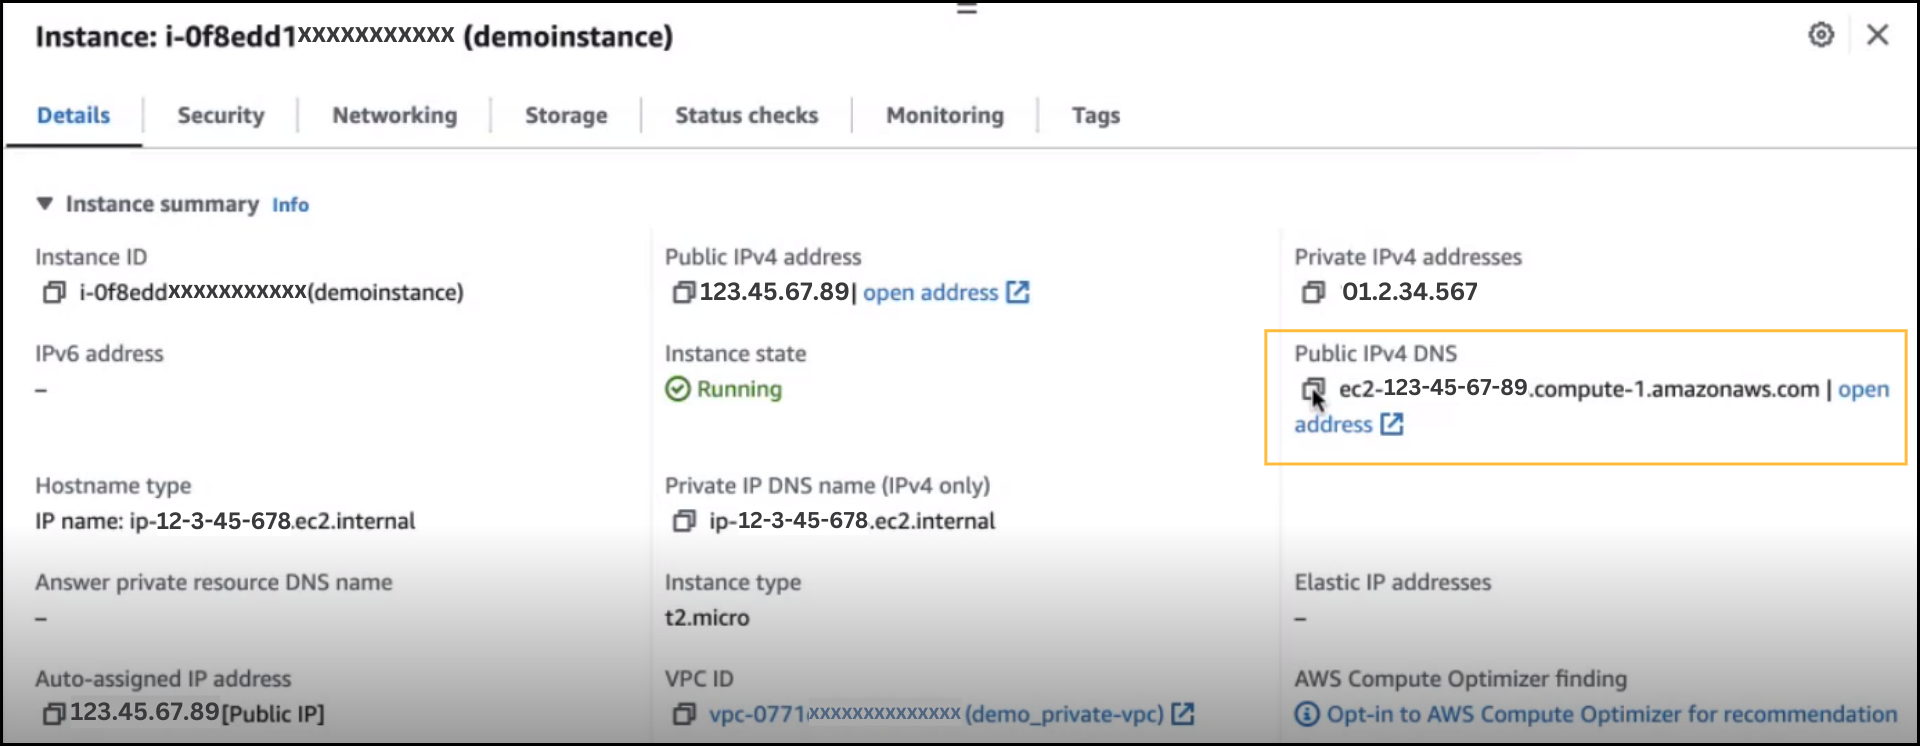
Copy and save the public IPv4 DNS as this will be your proxy host
Task 2: Add the EC2 Subnet group to your Database Subnet group
Here we edit the inbound subnet groups to connect the EC2 instance with the Database. This step creates a communication tunnel between the EC2 instance and the Database.
1. In the Amazon RDS dashboard, choose the above-created database instance and click on the VPC security groups URL under the Security section. 2. You will be redirected to the Security Groups page of the dedicated Database instance. Find the Edit inbound rules button and click on it.
3. On the edit page, perform the following:
| Destination | Action Needed |
|---|---|
| RDS MySQL |
|
| RDS PostgreSQL |
|
| Redshift |
|
.png?alt=media&token=fbcee706-e43a-4fc3-9c7c-fbd4c4ca9ba9)
4. Set Use Tunnel to SSH and provide Proxy Host.
Proxy Host is your Public IPv4 DNS that can be found in details of the EC2 instance in consideration.
5. Set the Proxy Port to 22 and the Proxy user to ec2-user(Default). You may also create a separate user in the EC2 instance.
6. Copy the Proxy SSH Public key and paste it in the EC2 Instances under .ssh/authorized_keys and save it.
7. Once you have saved the public key then click on Submit.
Note:
The steps laid out above are a pre-requisite before you start configuring RDS MySQL as a destination in Daton using SSH Tunnel/Proxy Server.
Set up on Daton
1. Login to Daton web-app.
2. Click on the connectors tab, then go to destination.
3. Find RDS MySQL & click on configure.
4. Enter any integration name, then click on next.
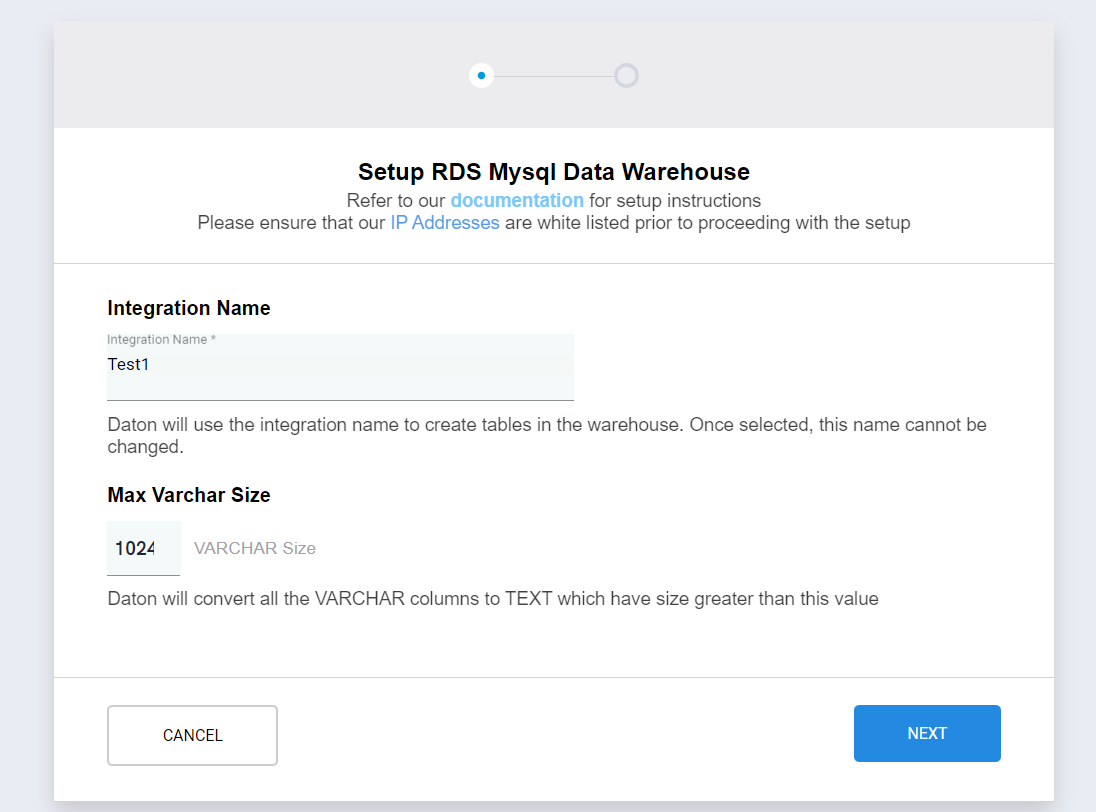
Note: You don't have to change the VARCHAR size.
5. Enter the following credentials to configure your warehouse:
- Select Use Tunnel as SSH
- Add the Proxy Host: Check task task 1.

- Add Proxy Port: As 22
- Add Proxy user: As ec2-user

5. Copy the Proxy SSH Public Key from daton.
- After copying go to, SSH Server/EC2 instances.
- Paste the public Key in authorised_keys file.
- Run the following command and then paste the key:
vi .ssh/authorized_keys - After Pasting, come back to Daton and click on Next.
6. Select the Schema of your choice.
.png?alt=media&token=092039e1-104a-4b53-afa8-ebaf6f2b0765)
7. Now hit Submit to complete the setup.