Set up Instructions for Amazon Redshift Destination
Instructions for granting Amazon Redshift access and setting up Amazon Redshift as a destination in Daton.
Set up Instructions for Amazon Redshift Destination
Instructions for granting Amazon Redshift access and setting up Amazon Redshift as a destination in Daton.
Setting up access to your Amazon Redshift data warehouse is not very complicated and just takes a couple of simple steps. If you don't have an existing account on AWS, you can sign up for a free tier here.
Follow the steps below to set it up for yourself, if you are stuck somewhere, feel free to contact out support team at support@sarasanalytics.com.
Prerequisites
Before you get started, ensure you have the following:
- Active Daton and AWS account
- Administrative user for your AWS account to create or configure a Daton-specific Amazon Redshift database.
Set up on Redshift
Task 1: Grant Cluster Access
Instructions to grant Redshift cluster access and (optionally) creating a user and schema for setting up Redshift as a destination in Daton:
- Access your Amazon Redshift Console.
- Click Clusters from the top left sidebar.

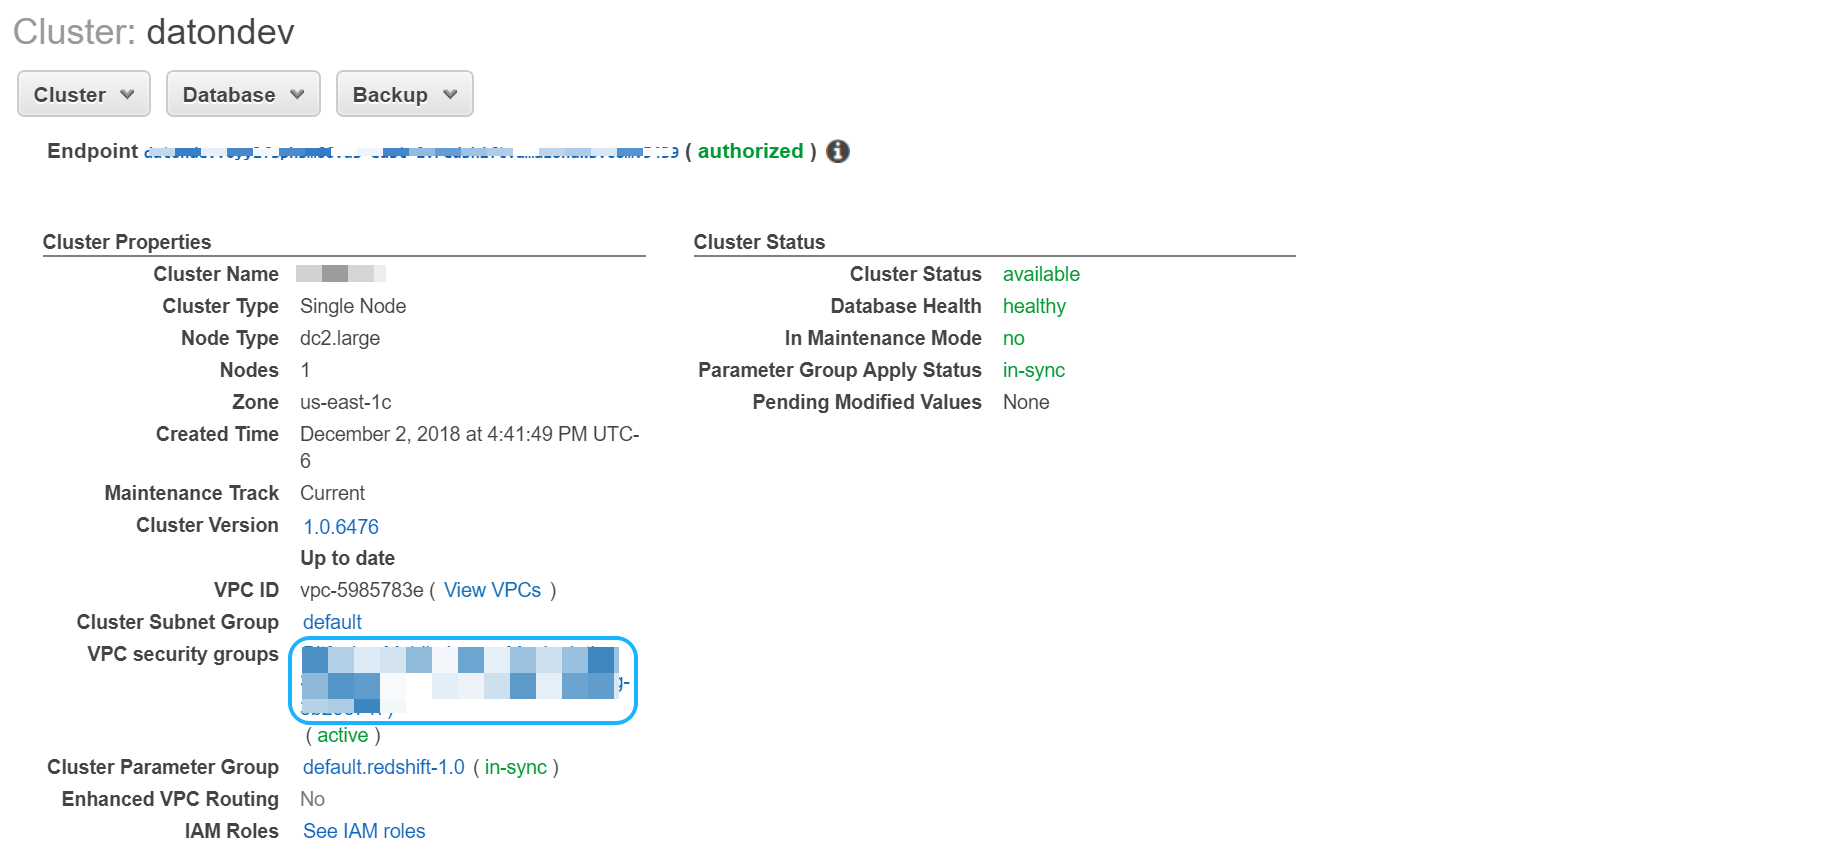
- Click on the specific Cluster.

- In the Configuration tab of the details page, note down the Redshift Hostname and Port from the Endpoint. This will be used on the Daton integration page.
- In the Configuration tab of the details page, under the VPC security groups, click the name of the security group.
- On the details page, click the Inbound tab, and click Edit.
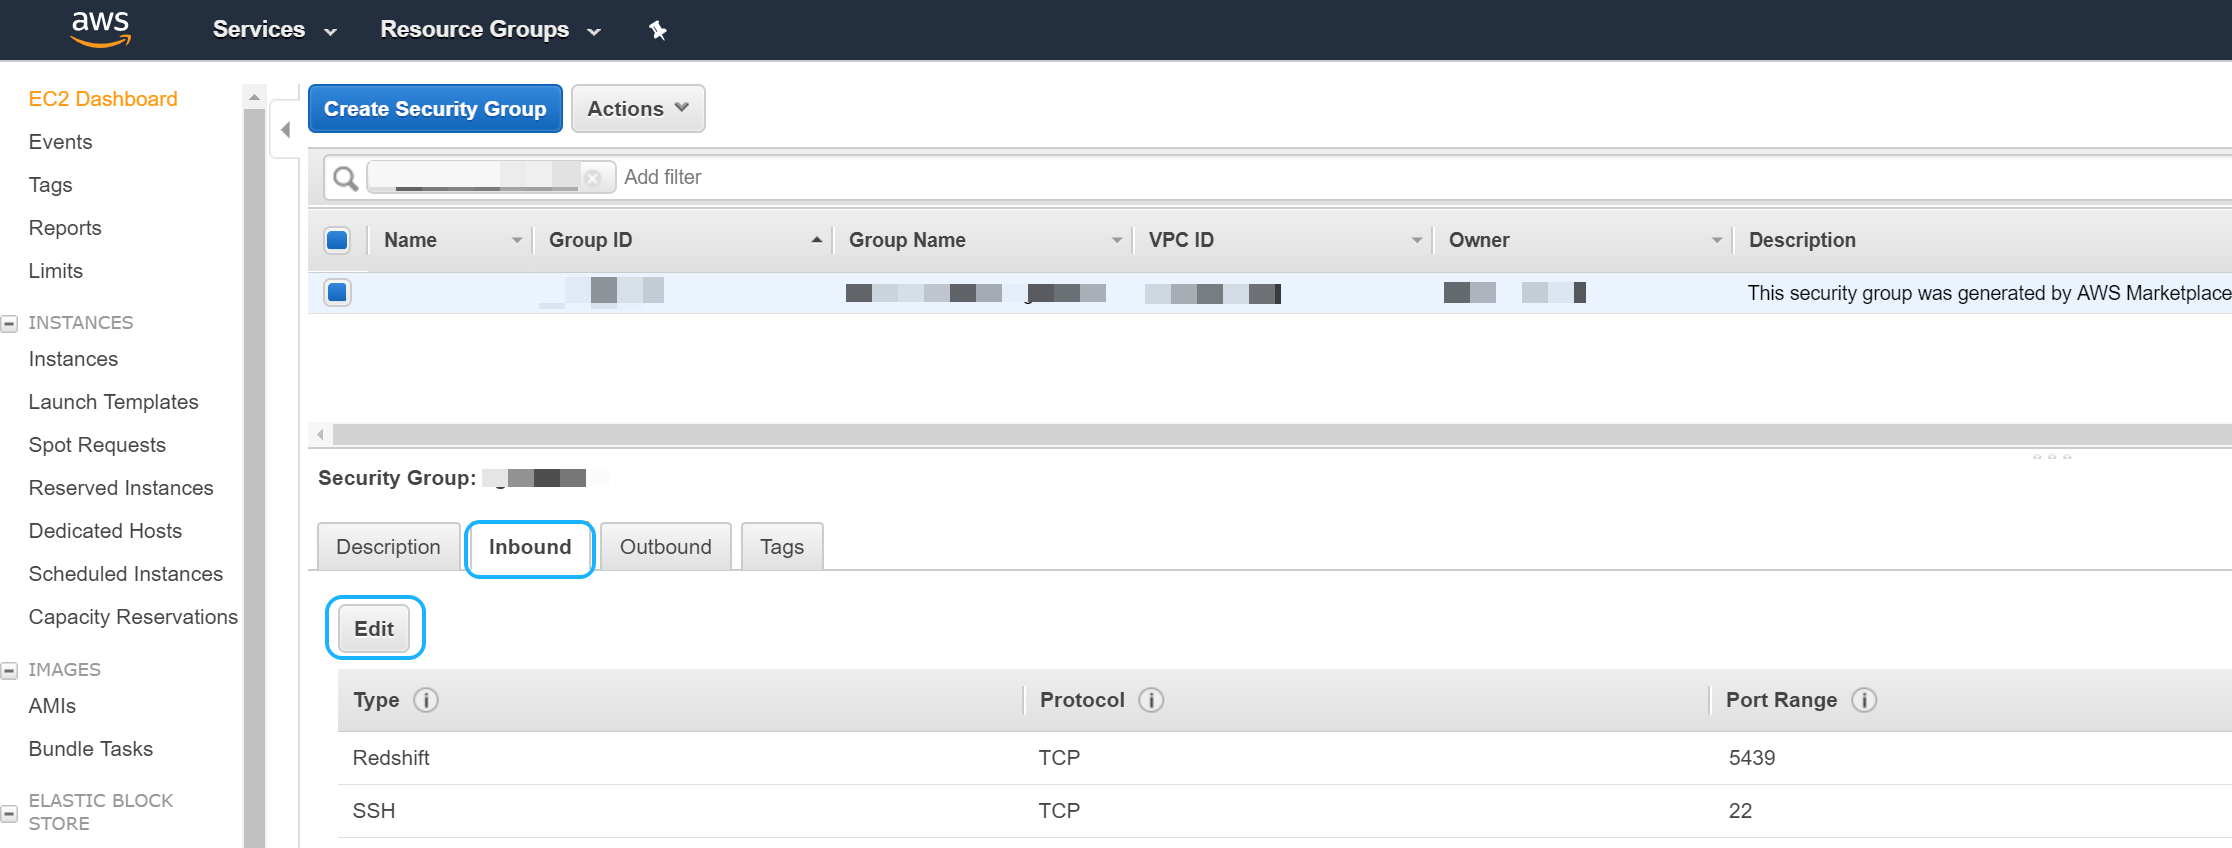
IP Whitelisting
Click Add Rule and white list the IP Addresses: 35.238.200.205/32

Make Instance Publicly Accessible
- Click on Actions and Modify publicly accessible setting and then set the instance to be publicly accessible

Task 2: Create a User and Schema for Daton
To enable Daton to write to a specific dataset, create a user for the relevant Amazon Redshift Dataset:
- Access your Amazon Redshift Console.
Click the Query editor and run the below commands to grant privileges to Daton. Change the user, password, and db-name per your choice.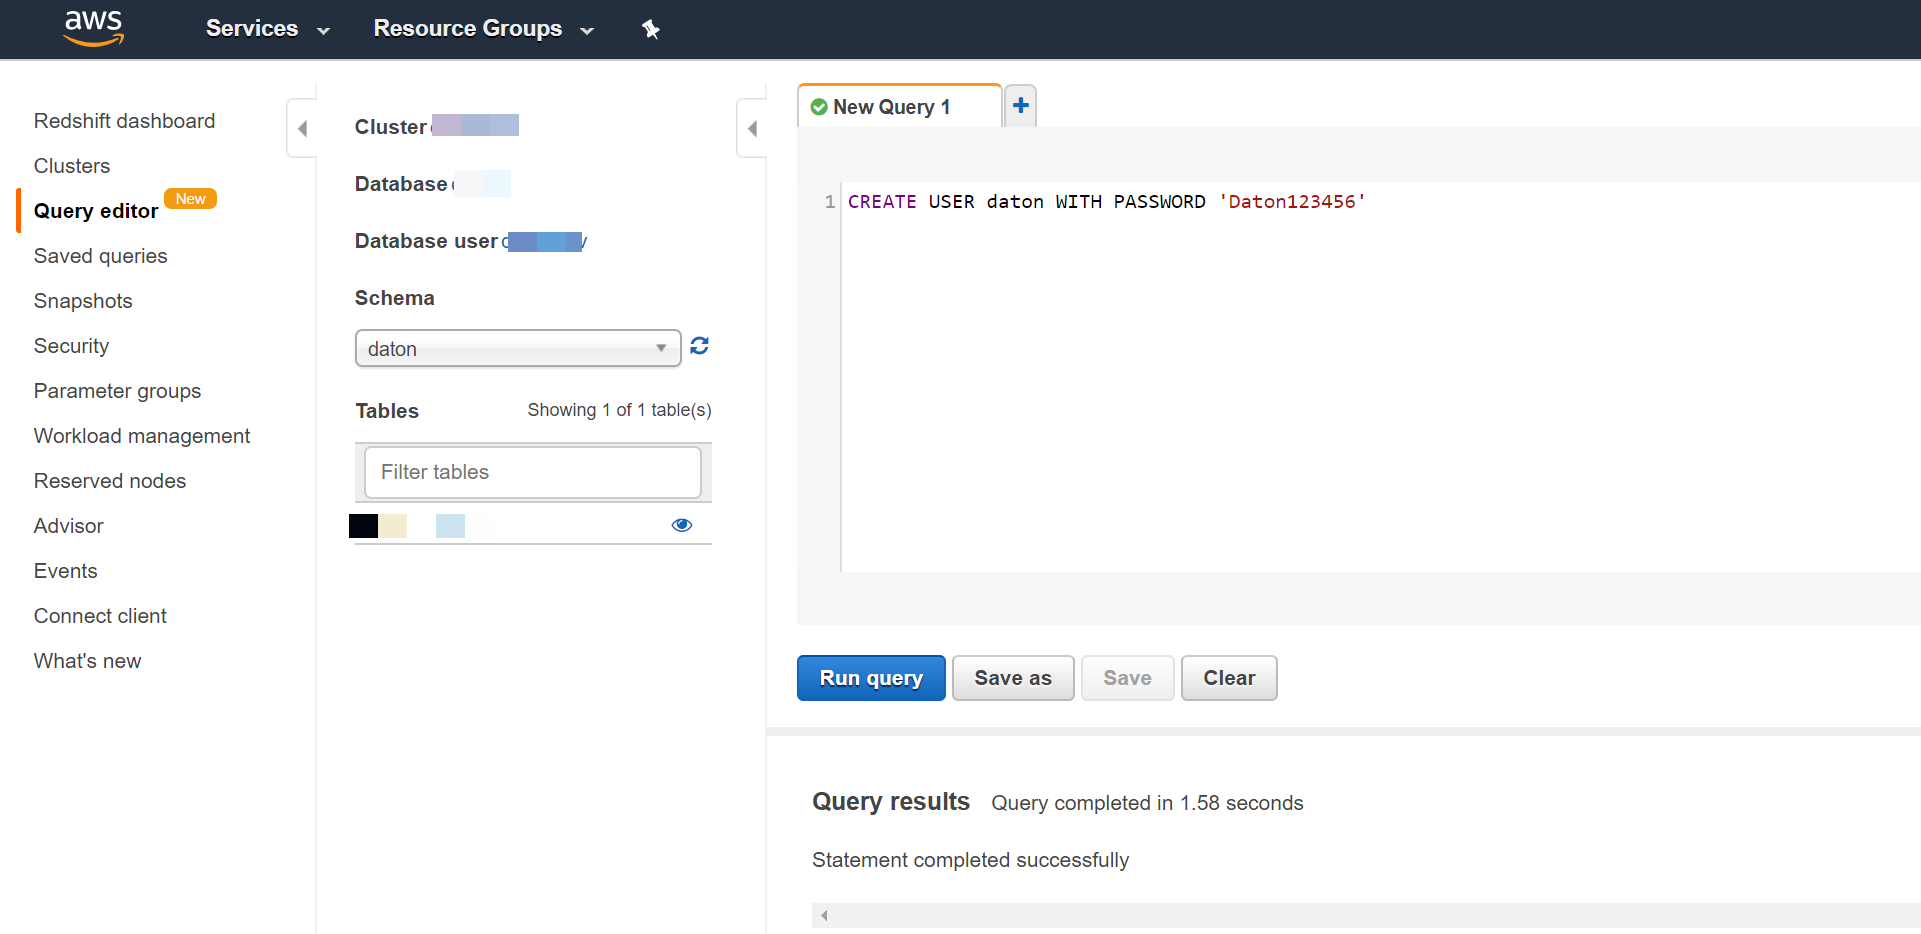
CREATE USER daton WITH PASSWORD 'yourpassword';CREATE SCHEMA daton AUTHORIZATION daton;GRANT CREATE ON DATABASE db-name to daton;That's it, you're done configuring access — time to connect to Amazon Redshift.
Task 3: JDBC URL and other configuration parameters
- Click Clusters from the left menu and click on the cluster name to view the cluster details.

- Scroll down to see the JDBC URL details and note them. This URL is required along with the database username and password while integrating Redshift on Daton.

The steps laid out above are a pre-requisite before you start configuring Redshift as a destination in Daton.
Note
If you wish to connect the destination using Proxy Server or SSH Tunnel, from here on, follow the steps mentioned in this document instead:
Setup on Daton
1. Login to Daton web-app.
2. Click on the connectors tab, then go to destination.
3. Find Amazon Redshift & click on configure.
4. Enter any integration name.
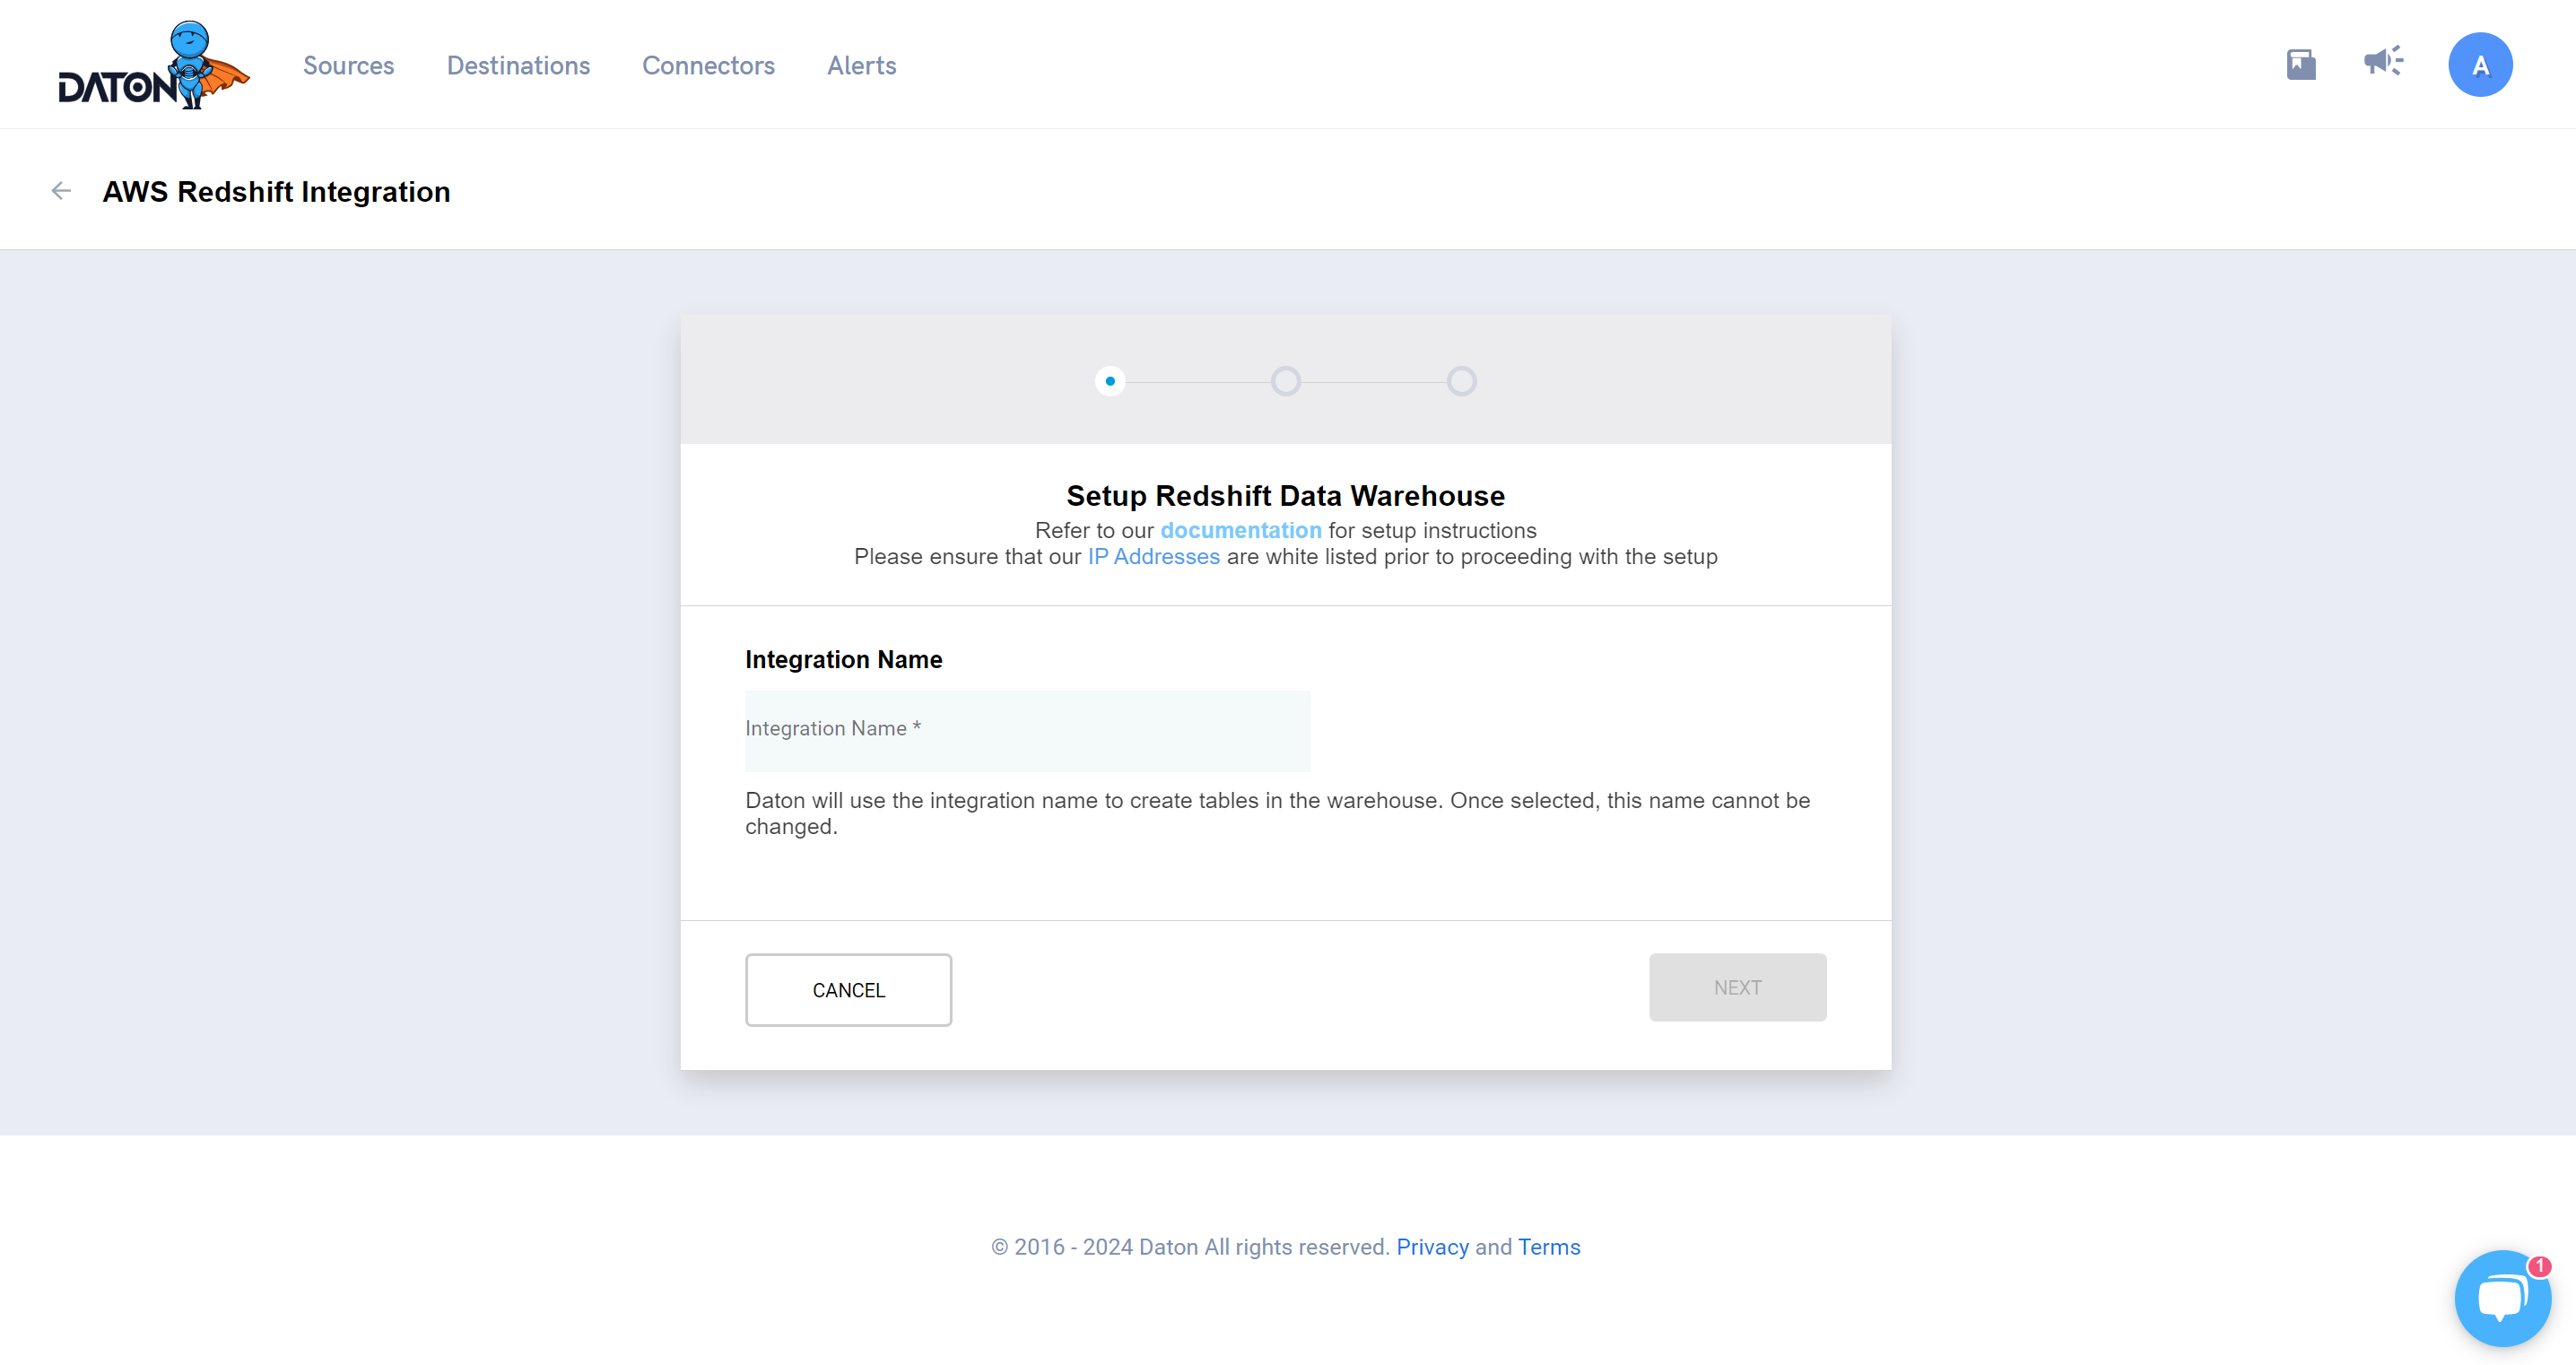
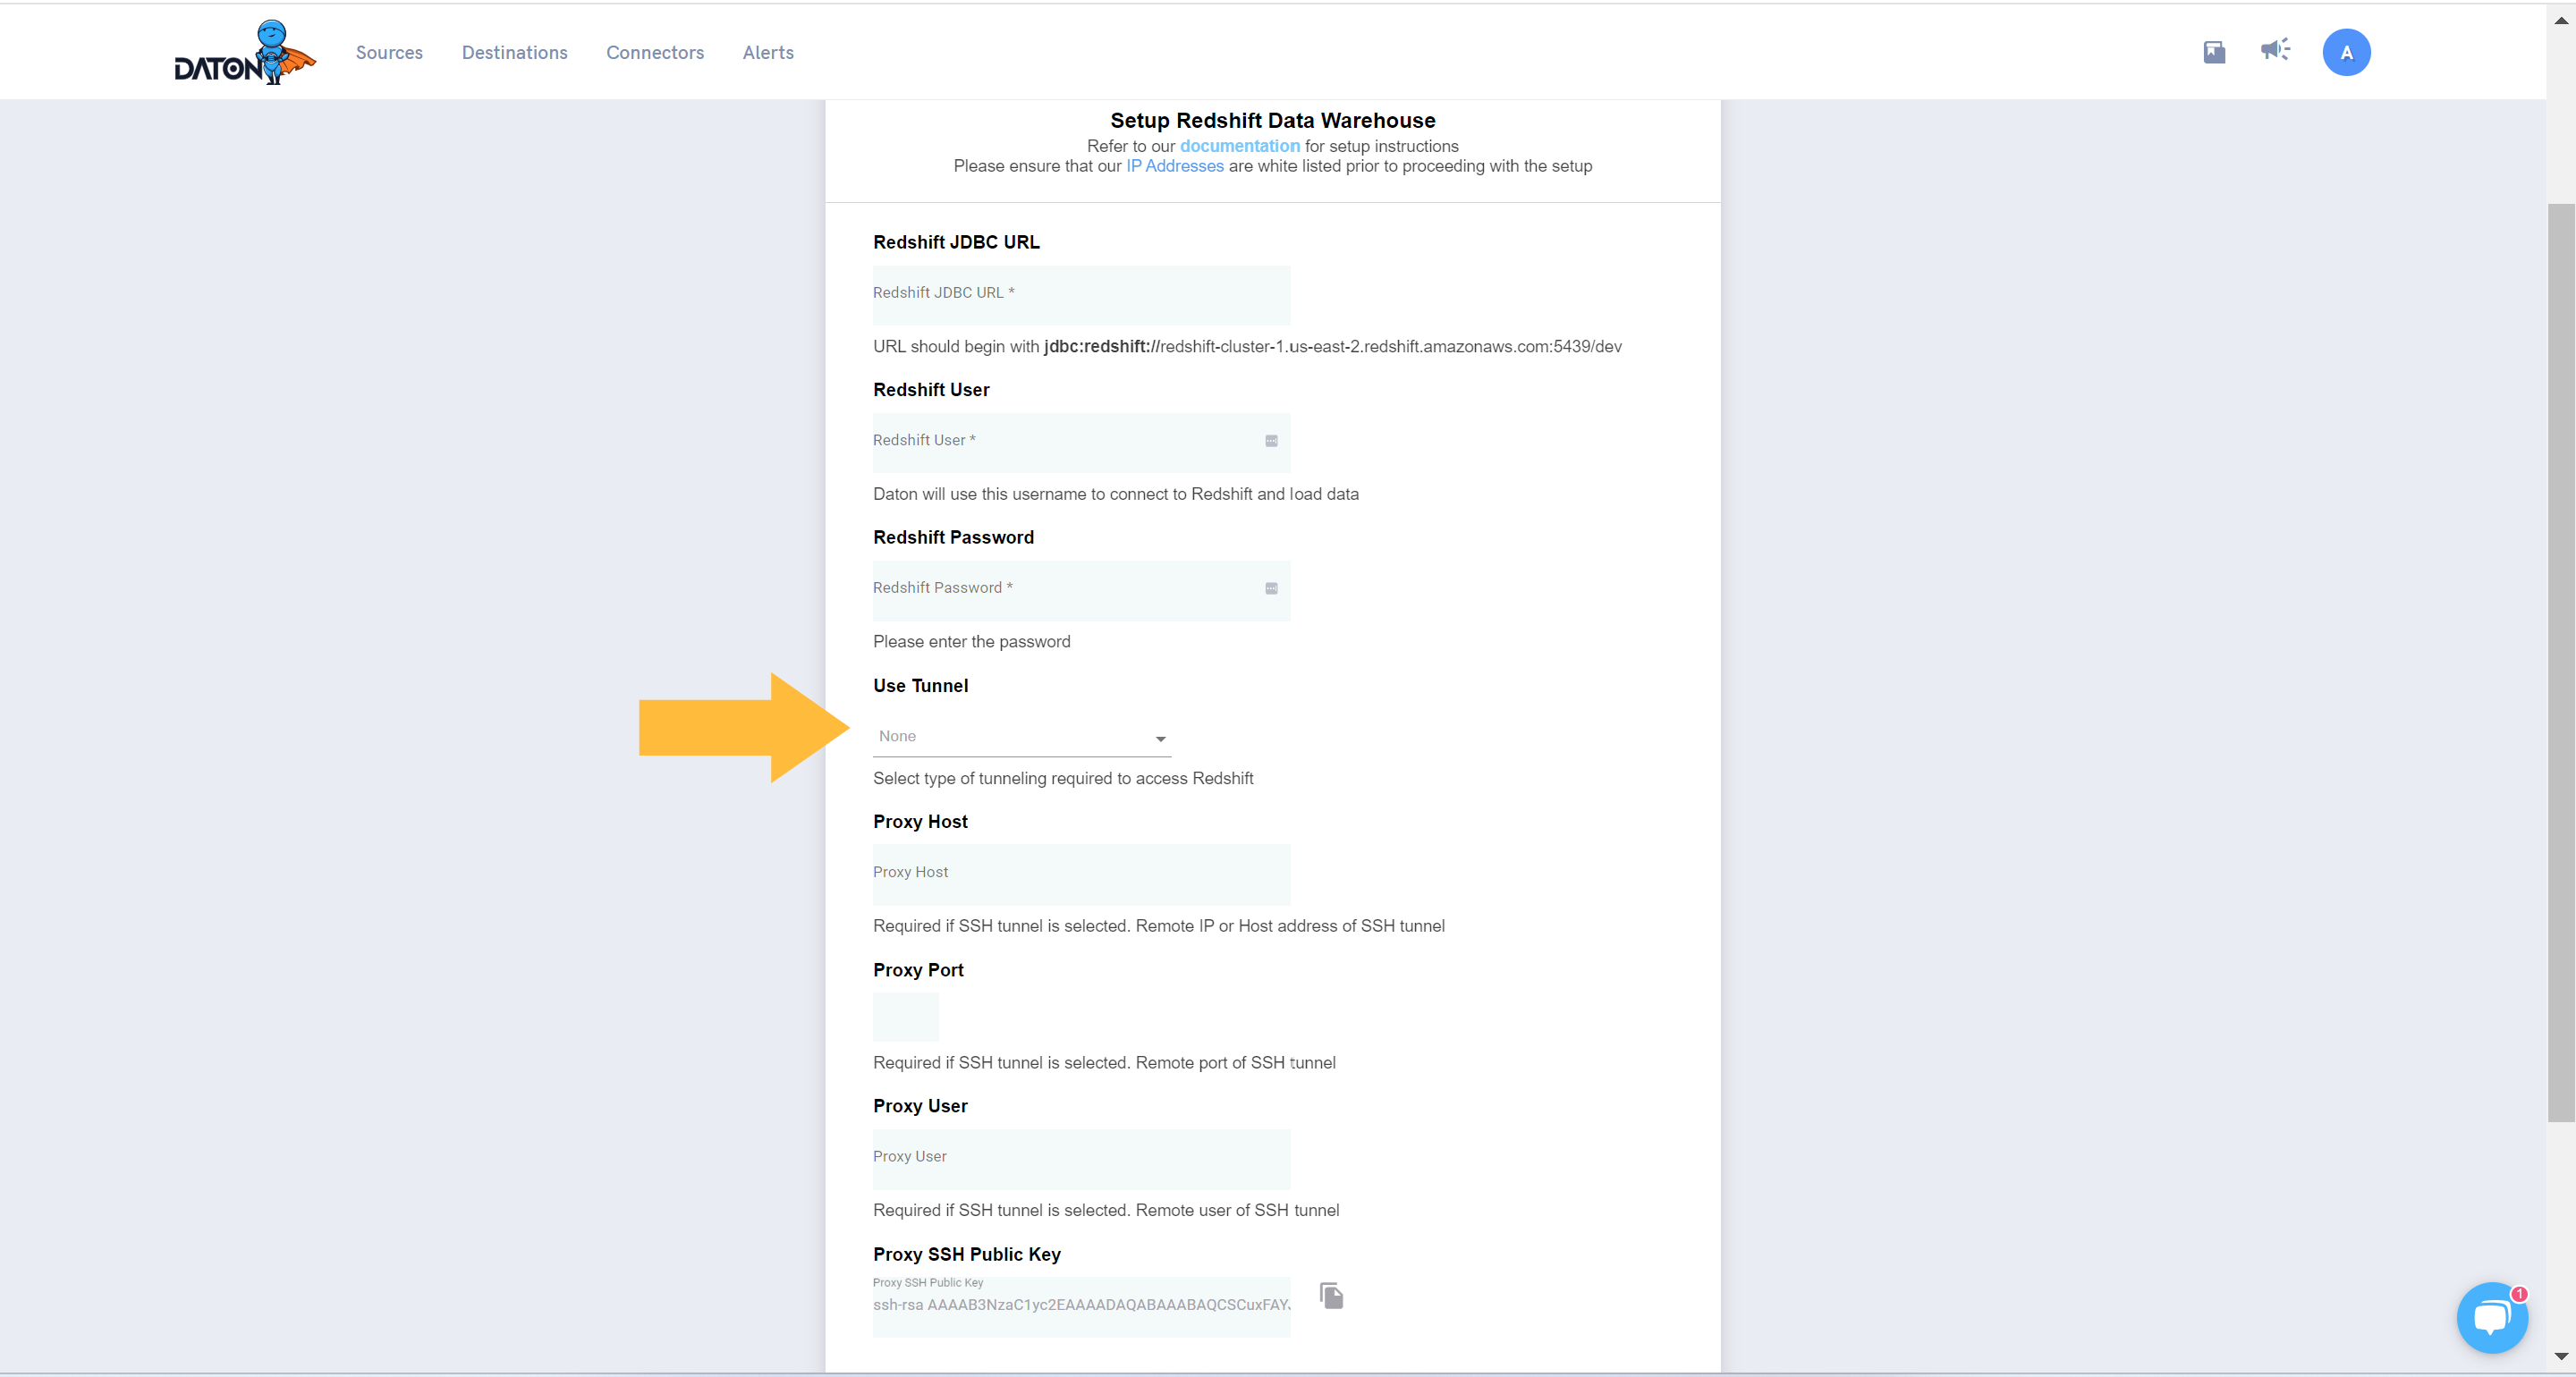
4. Enter the following details:
- JDBC URL: Check task 3, step 2
- Redshift User: This is the same as master username, check task 3, step 2.
- Password: The password you created.
- Use Tunnel: None
- Then click on next.
5. Select the Schema of your choice.

6. Click finish to complete the setup.
Replication Guide
Daton has been built to handle multiple data warehouses. Since all data warehouses are not built the same, the choice of a data warehouse may impact how Daton loads data. This section tables some key capabilities and limitations of RedShift that impact how data looks in your data warehouse.
| Feature | Supported | Comments |
| Nested Fields | Yes | |
| Primary Keys | Yes | |
| Updates | No | Redshift doesnt allow updating while insert mechanism. Instead, Daton will append data to the end of the table with every replication run. |
| Full table replication | Yes | |
| Column based | No | |
| Inserts only | Yes | |
| SSH Connections | Yes | |
| Adding columns to existing integration | Yes | When new columns are added to an existing table in Amazon Redshift, user is given two options. Depending on their choice, the new column(s) is added and entire table is re-loaded or there is no re-load. Read the edit integration (proceed link) functionality to understand the impact of making changes. |
| Removing columns to existing integration | Yes | Users can use the edit integration functionality |
| Adding tables to existing integration | No | When tables are deselected from an integration, the loads into those tables stop. Daton doesn't delete the tables from the data warehouse. This is great for cases where usage of a source has been discontinued, but there is a desire to capture that data. |
| Table Partitioning | Yes |