How to Integrate ShipBob with Daton
How to Integrate ShipBob with Daton
This subtopic provides step-by-step instructions to create Shipbob integrations in Daton, detailing the prerequisites, the integration process, and important notes.
Pre-requisites
Before starting, ensure you have
An active Daton and ShipBob account.
A Personal Access Token (PAT) for your ShipBob Account.
Task 1: Create an Access Token (Personal Access Token (PAT)) for Your ShipBob Account
- Log in to your Shipbob account.
- On the dashboard, click Integrations in the left-hand navigation bar.

- Choose API Tokens from the drop-down menu to access the Personal Access Token (PAT) page.
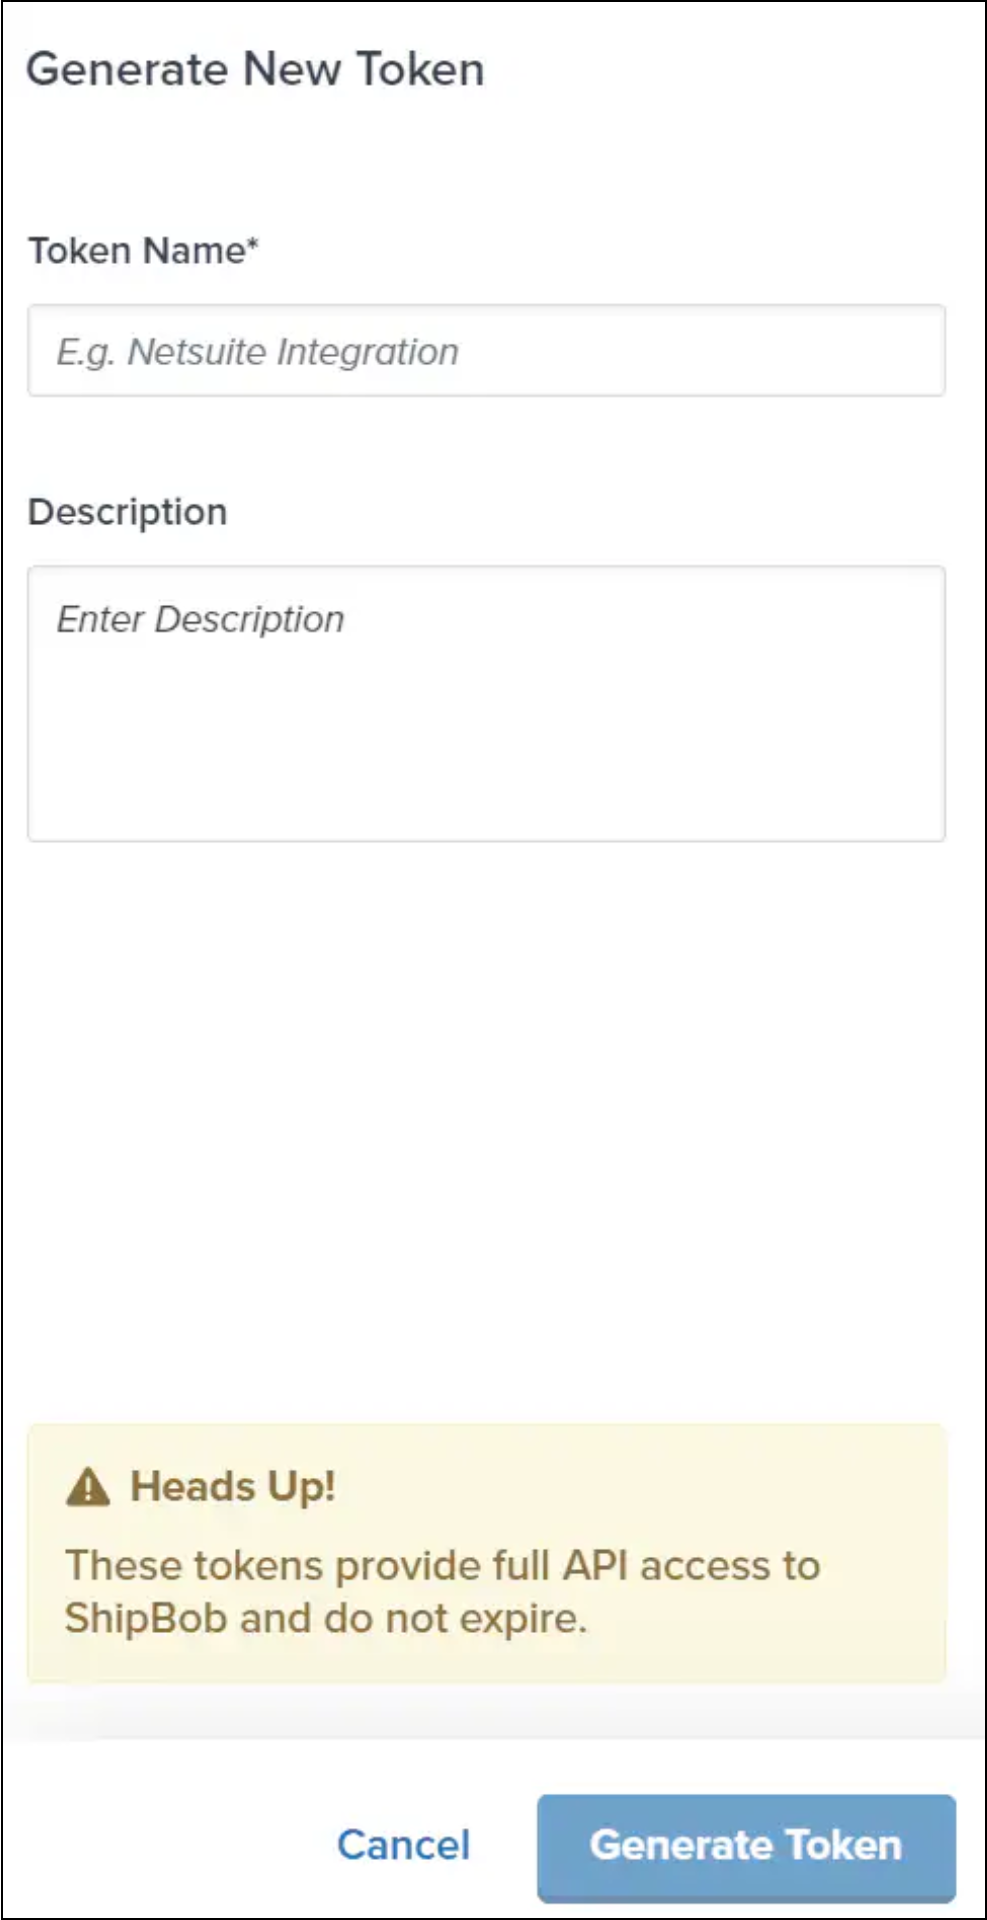
- Click Generate New Token, and a sidebar will appear on the right side of the screen.

- Provide a Token Name (up to 100 characters) and a Description (up to 250 characters) to identify and explain the token's purpose.
- Click Generate Token at the bottom right to create the PAT.

- Click Generate Token at the bottom right to create the PAT.
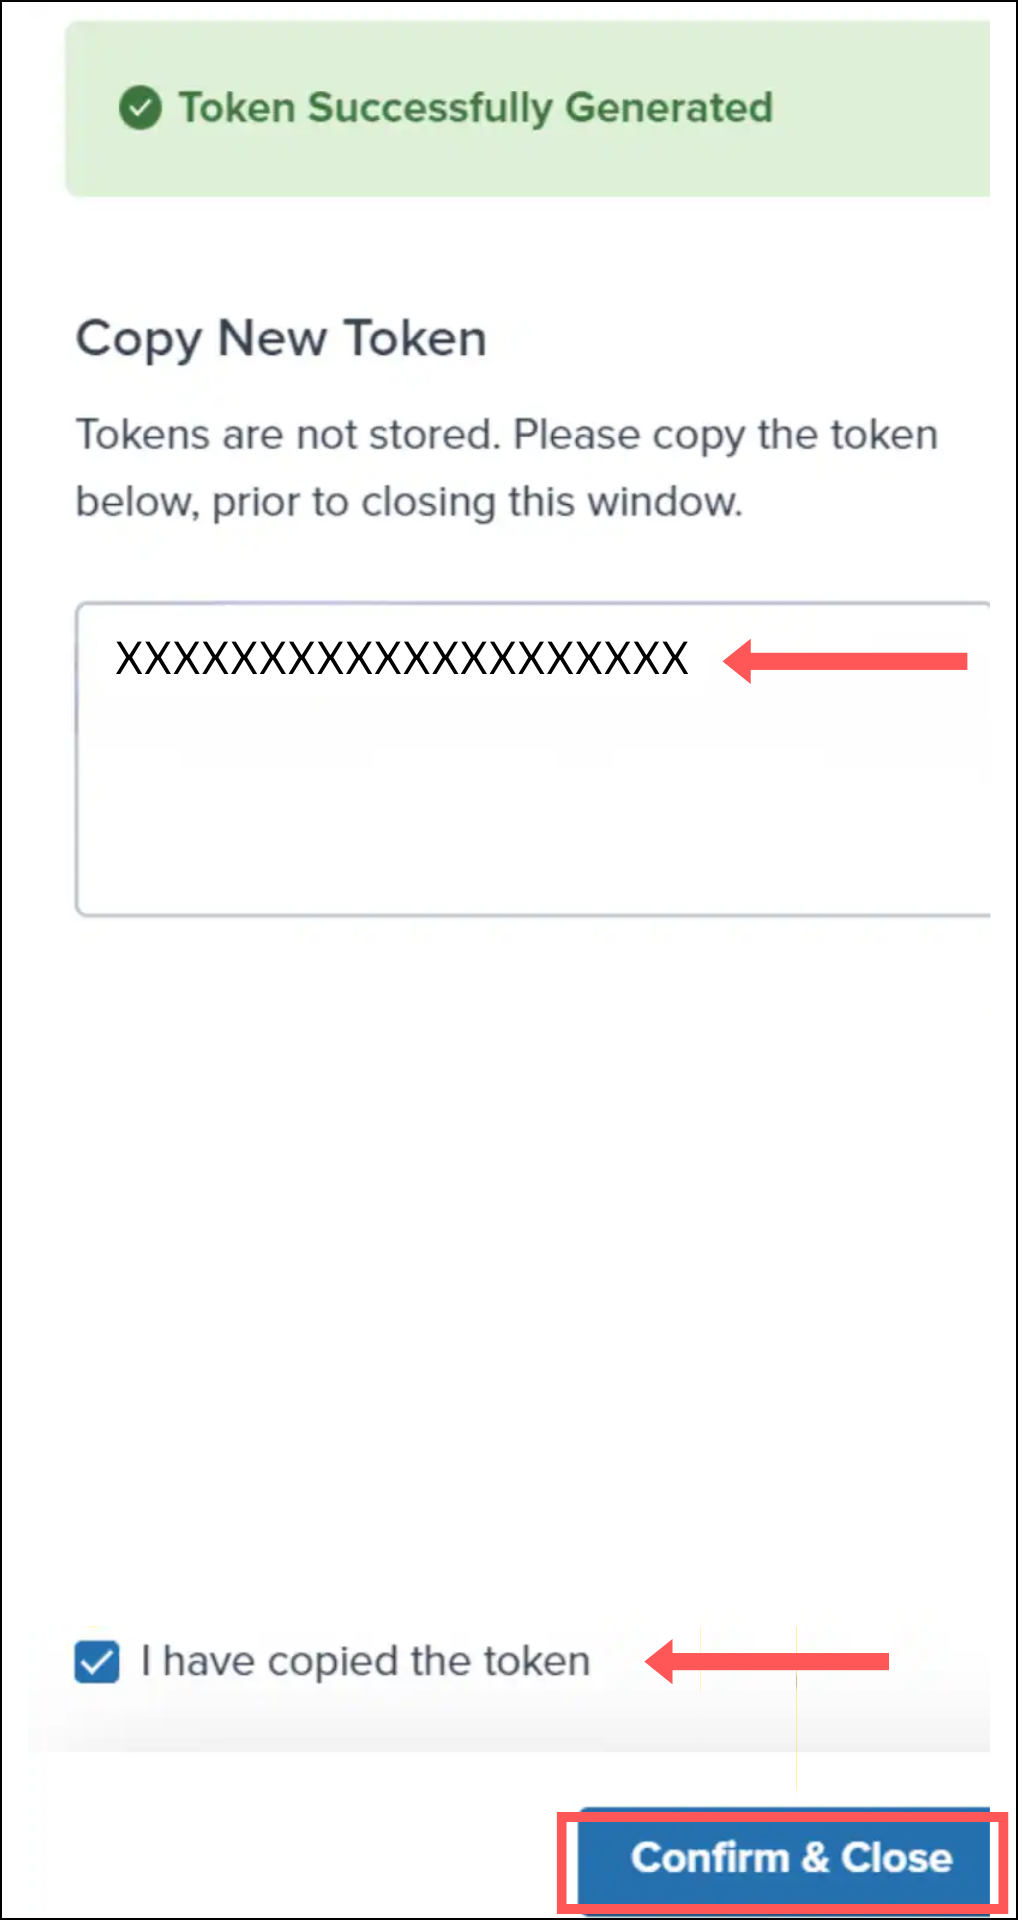
- A confirmation message will appear, and an email notification will be sent to relevant users.
- Copy the token provided as it won't be visible again in the dashboard. Save it securely.
- Check the box confirming that I have copied the token.
- Click Confirm & Close to complete the process.

To know more about PAT creation and access for Shipbob, see API Token Generation (Personal Access Token).
Task 2: Integrate Daton with ShipBob
- Log in to your Daton account and search for ShipBob in the list of Connectors, then click Configure.
- Enter the following details and click Authenticate:
- Integration Name
Note that the Integration Name will be used to create the integration tables and cannot be modified later. - Optionally, add a description to identify the integration.
- Replication Frequency
- Replication Start Date
- Optionally, expand the Advanced Configuration Options section and, based on your requirements, modify the options to control the loading behavior of Daton.

- Integration Name
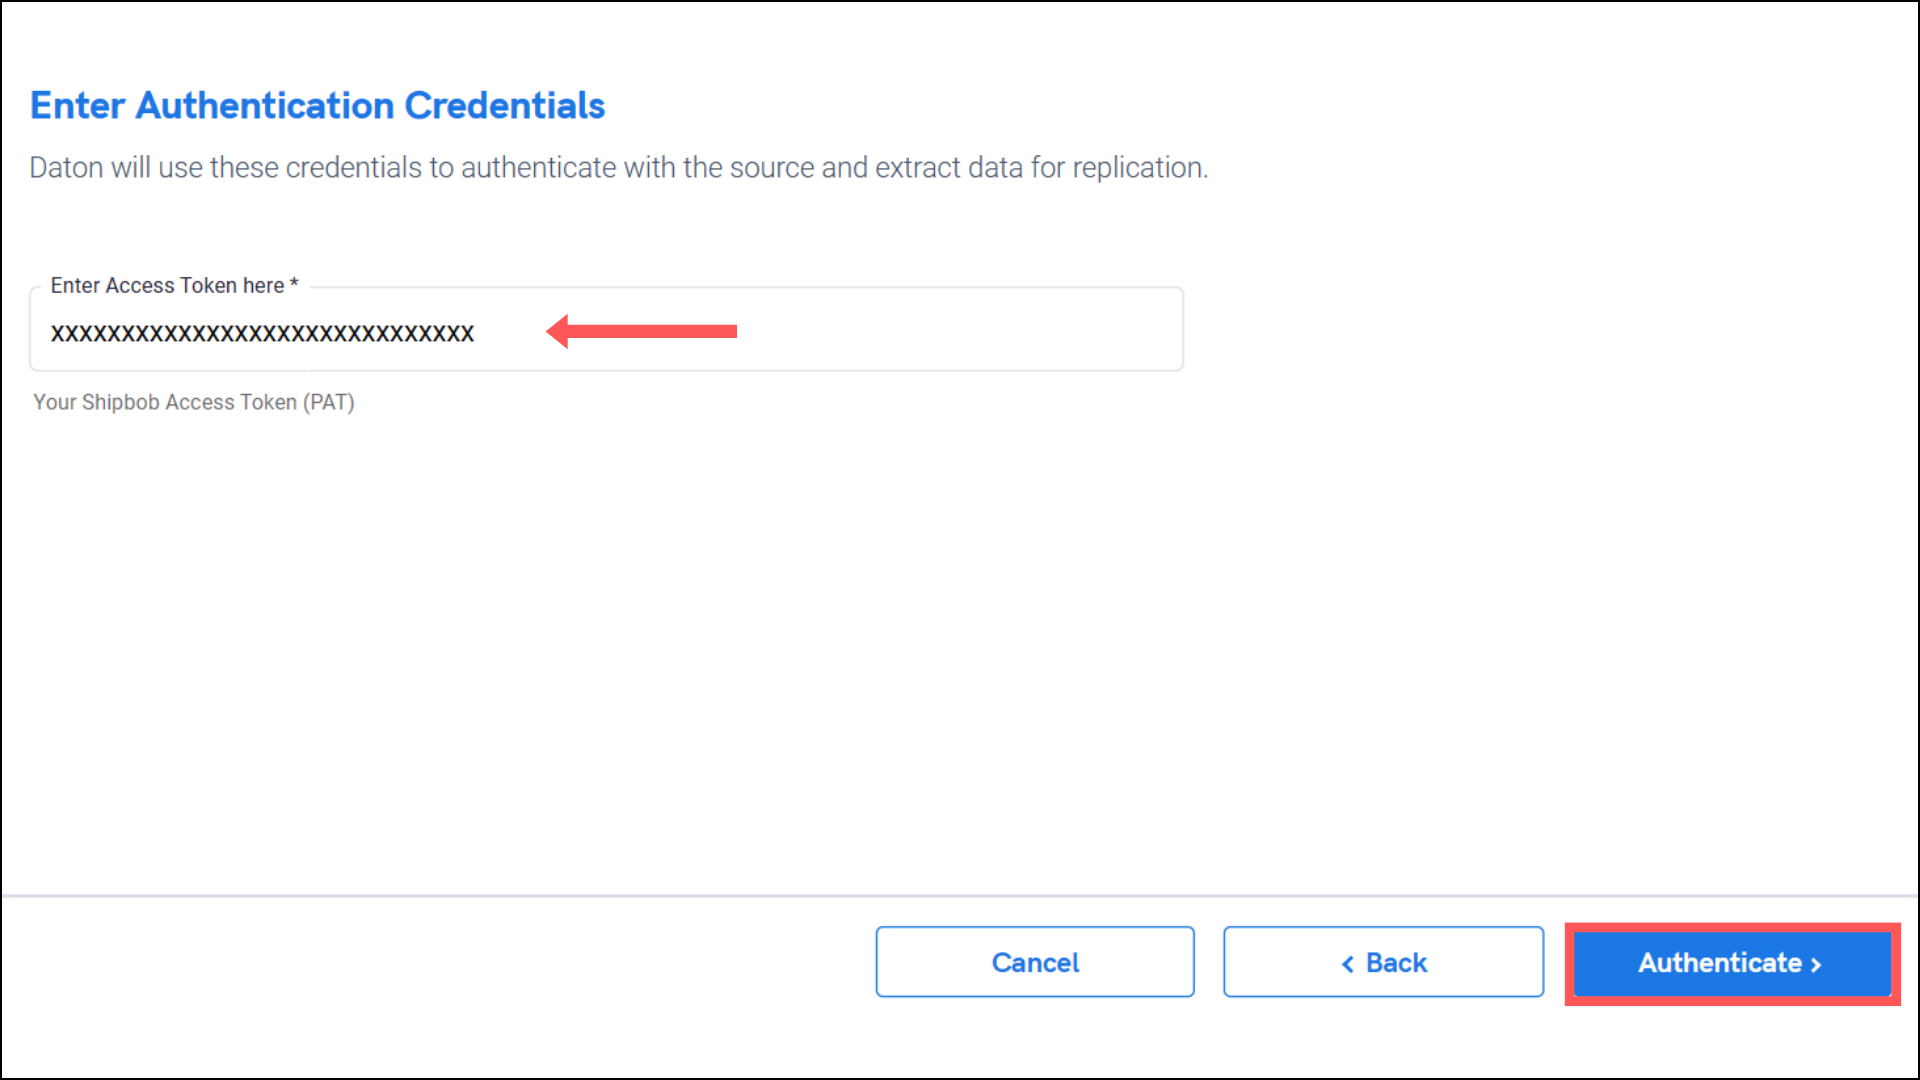
- Copy and paste the API token you created for your ShipBob account to authenticate the integration and extract data for replication.
- Then click Authenticate.

- Then click Authenticate.
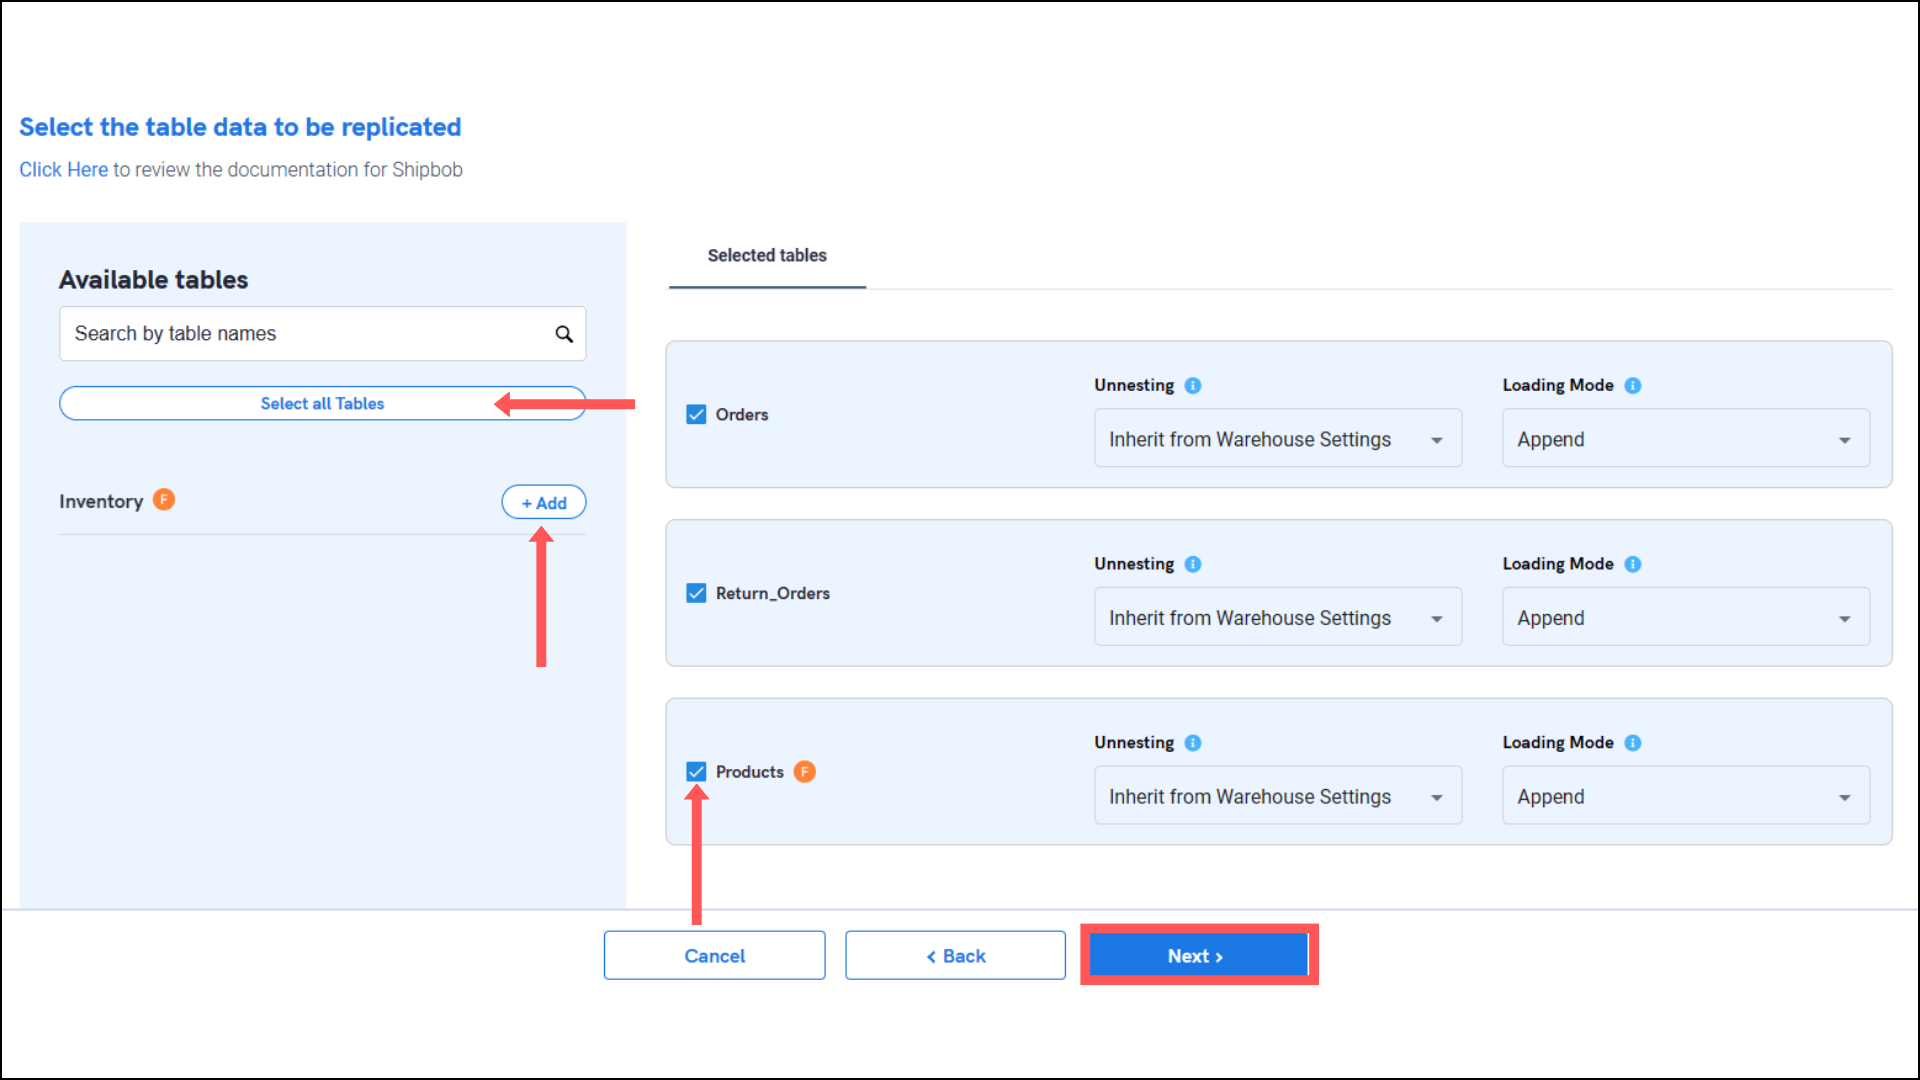
- After successful authentication, you will be prompted to choose from the list of available tables. Select the required tables and click Next.
- Optionally, based on your requirement, select specific options for each selected table.

- Optionally, based on your requirement, select specific options for each selected table.
- Select the required fields for each table and click Submit.
-
Note that you will be prompted to select the destination for your account.

-
Note that you will be prompted to select the destination for your account.
- Select the destination for your store or shop and click Confirm. An integration successful message will be displayed.
Important Note
- Integrations would begin in the Pending state and change to the Active state once the first job successfully loaded data into the configured warehouse.
- Users can check job status and process logs from the integration details page by clicking on the integration name in the active list.
- Users can Re-Authenticate, Edit, Clone, Pause, or Delete the integration at any moment by clicking on settings. You can also adjust the frequency and history of the integration.
- On the Sources page, click Integration to access each table in your integration. The page also shows the state of each table, the last replicated time, and Reload access buttons.
