Setup Instructions for Podscribe
Setup Instructions for Podscribe
In this article, we will look at the steps to integrate Podscribe with Daton.
Find the links to other articles related to Podscribe below:
Prerequisites
Before we get started, make sure you have an active Daton and Podscribe API account.
Task 1: Generating API Key
- Log in to your Podscribe account, click the profile icon in the top-right corner, and select Account.
- In the Account → API section, copy your API Key.

- Advertiser : Obtain an Advertiser from Podscribe UI. Advertiser name is necessary to authenticate your requests and access the data.
Task 2: Integrate Podscribe with Daton
1. Log in to your Daton account and search for Podscribe in the list of Connectors, then click Configure.
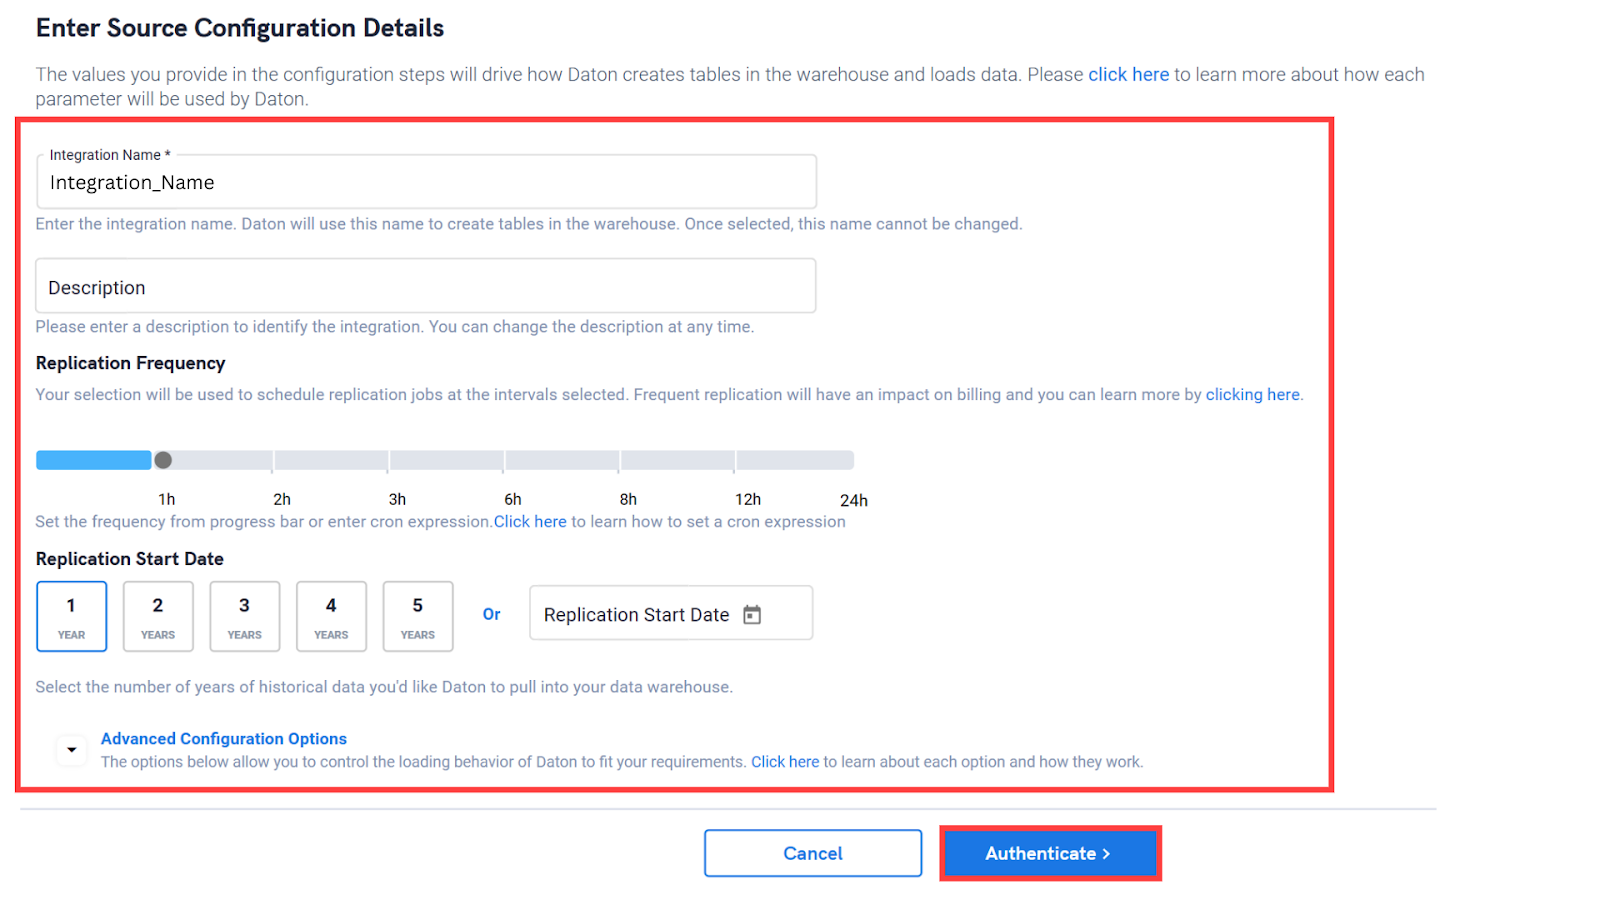
2. Enter the following details and click Authenticate:
- Integration Name
- Replication Frequency
- Replication Start Date
Note that the Integration Name will be used to create the integration tables and cannot be modified later.
Note: Please ensure the replication start date is set within the last 30 days, as hourly reporting data is only available for that period. If hourly reporting is not required, you can deselect the hourly column in the column selection and pull up to 90 days of data without it
3. Provide the API Key and Advertiser and click authenticate.

4. After successful authentication, you can choose from the list of available tables. Select the required tables and click Next.

5. Select the required fields for each table and click Submit.

6. Select the destination and click Confirm.
An integration successful message will be displayed.
Important Note
- Integrations would begin in the Pending state and change to the Active state once the first job successfully loaded data into the configured warehouse.
- Users can check job status and process logs from the integration details page by clicking on the integration name in the active list.
- Users can Re-Authenticate, Edit, Clone, Pause, or Delete the integration at any moment by clicking on settings. You can also adjust the frequency and history of the integration.
- On the Sources page, click Integration to access each table in your integration. The page also shows the state of each table, the last replicated time, and the Reload access buttons.